Replacing A bedroom door can be A rewarding And relatively straightforward home improvement project that can give your space A fresh look. Whether you’re looking to upgrade A worn-out door Or simply want to change the style to better match your decor, Learning how to replace A bedroom door can save you money on hiring A professional And allow you to take control of your home improvement efforts. We will walk you through replacing a bedroom door step-by-step in this article. Before you begin the replacement process, It’s important to note that the specific steps may vary depending on the type of door you have And the hardware involved.
Which equipment and supplies did we need to replace the door?
To replace Unlock a bedroom door, You will need several basic tools and supplies. Here is a list of some common equipment And supplies you may need.
- Screwdriver
- Hammer
- Pry bar
- Measuring tape
- Chisel
- Replacement doo
- Hinges
- Screws And nails
- Wood filler And paint
Here Are Some Ideas On How To Replace A Bedroom Door
Step 01- Look At The Overview Of The Old Door

Before you start replacing the bedroom door, It’s essential to carefully assess the condition of the old entrance. Take a close look at the gate, Noting any damage, Such as cracks, Warping, Or peeling paint. Check the hinges And hardware to see if they are functioning properly Or if they need replacement. Measure the size And dimensions of the old entrance to ensure you select the right size for the replacement. Inspect the gate frame And trim to see if they are in good condition or if they need any repairs Or adjustments. Taking an overview of the old entrance will help you plan the door replacement project more effectively And ensure that the new door fits properly And functions well.
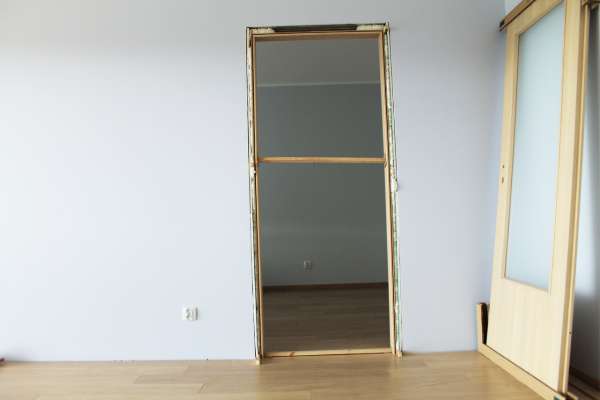
Step 02- Then Remove The Old Door

Once you have assessed the condition of the old entrance And gathered the necessary tools And supplies, The next step in replacing a bedroom gate is to remove the old entrance. Start by carefully removing the hinge pins using a screwdriver And hammer, Tapping them out from the bottom up. Then, Gently lift the old door off the hinges And set it aside. If there is any trim Or molding around the gate, Use a pry bar Or crowbar to carefully remove it, Taking care not to damage the surrounding wall Or gate frame. Inspect the gate frame for any remaining screws Or nails that may be securing the old entrance in place And remove them.
Step 03- Measure The Doorframe

Measuring the gate frame accurately is a crucial step in replacing a bedroom door. Use a measuring tape to measure the height, Width, And thickness of the gate frame, As well as the size And placement of the hinge mortises And strike plate recesses. Make sure to measure from the inside of the doorframe, As this is where the new entrance will be installed. Double-check your measurements to ensure accuracy And compare them with the dimensions of the new door to confirm that it will fit properly.
Step 04- Select The New Door To Install

Consider the style, material, And size of the door that will best match your interior design And functional needs. Measure the dimensions of the old gate frame And select a new entrance that matches these measurements, Taking into account the height, width, And thickness of the gate. Consider the material of the new entrance, Such as wood, metal, Or composite, And choose a style that complements your home’s aesthetic. Additionally, Check if the new entrance comes with a pre-drilled hinge And latch holes that align with your existing door frame Or if you need to drill new holes.
Step 05- Cut The Door To The Size Of The Frame
Cutting the gate to fit the frame’s dimensions is one of the process’s most crucial tasks. How to do it is as follows:
Determine the frame’s height And width first by measuring it. The frame’s height from the top to the floor And width from one side to the other should be measured.
- Measure the door: Next, Take a measurement of the entrance’s height And width. Take precise measurements from the top to the bottom And from one side to the other of the door.
- Indicate the door: On the side of the gate, That will face the interior of the room, Use a straight edge And a pencil to indicate the door’s height And breadth.
- Cut the door: Cut the gate along the drawn lines using a hand Or circular saw. When using power tools, Always be sure to use safety goggles And take all necessary safety measures.
- Try fitting the door: After cutting it, Try fitting the gate in the frame will ensure a proper fit. You might need to trim the gate even more if it is too large. To achieve a tight fit if it’s too small, You might need to add some shims.
- Install the hardware: Once the gate fits correctly, install the hardware, including the hinges, Doorknob, And latch.
- Final touches: To eliminate any rough patches Or splinters, Sand the gate’s edges. To make the gate match the decor of the room, You might also need to paint Or stain it.
Remember that cutting a gate might be difficult, So it’s advisable to employ a professional if you’re not confident doing it yourself.
Step 06- Mark The Hinge Placement
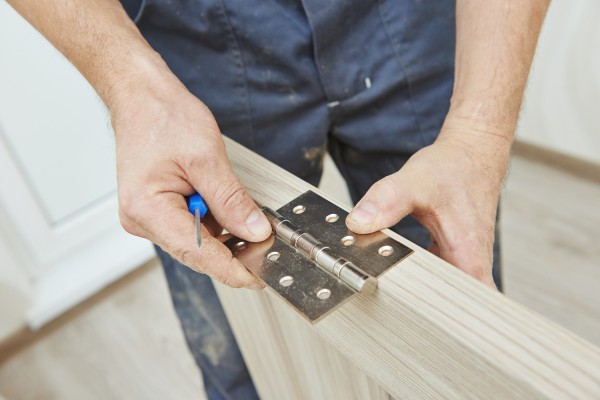
To mark the hinge placement for replacing a bedroom gate, Follow these steps:
The first step in marking hinge placement is to measure And mark the distance between each hinge on the old gate. Use a tape measure to ensure accuracy while measuring. Once you have measured And marked all three hinges, Transfer these measurements onto your new entrance using a pencil Or marker. To ensure that your markings line up when fitted, check to be that they are squarely positioned on both sides of the door. Next, Use a spirit level to ensure that your markings are straight And level with one another.
Step 07- Chisel Cut For The Hinge
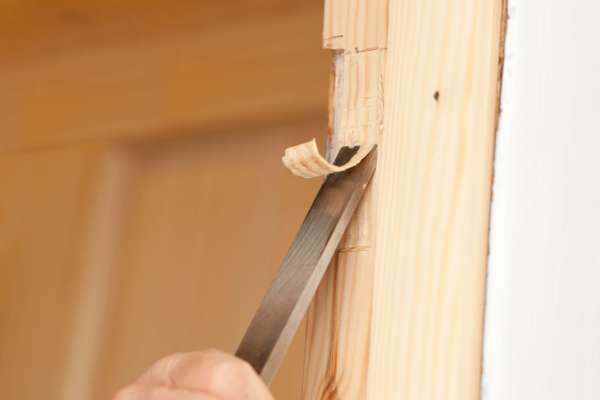
To make a chisel cut for the hinge when replacing a bedroom door, Follow these steps:
To begin, You will need to remove the old entrance from its hinges using a screwdriver Or drill. After it has been removed, Measure the new door’s measurements to determine how much wood will need to be trimmed to make the hinges fit properly. On both sides of the frame, Indicate where the cuts need to be made using a straight edge Or ruler. Next, Use a sharp chisel And hammer to create shallow cuts along your markings. You want to create an outline of where you’ll cut deeper later on.
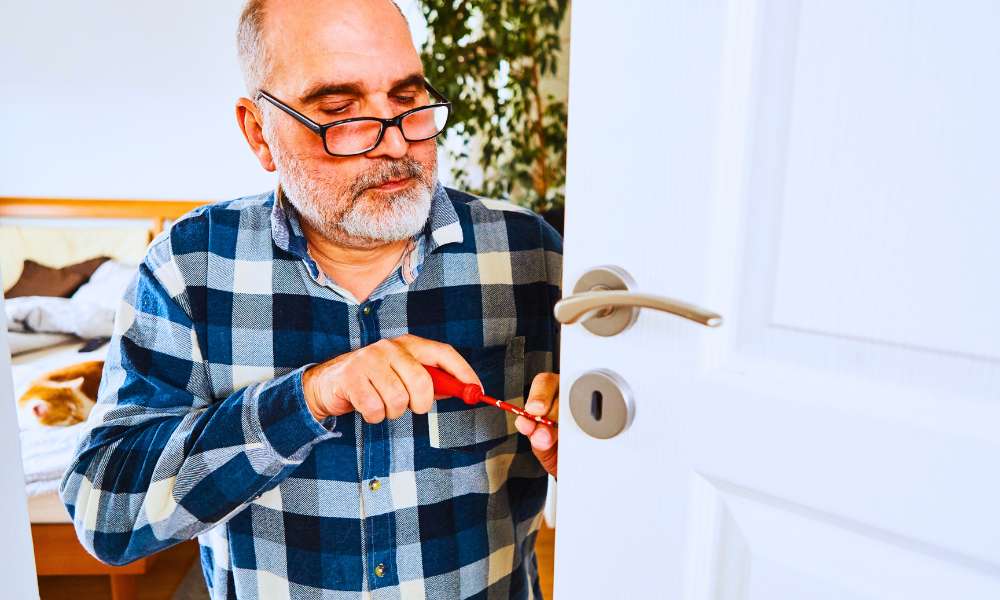
Step 08- Use A Door Lock Installation Jig

To use a door lock installation jig to replace a bedroom gate, Follow these steps:
- Measure the backset of the lock you want to install. The backset is the distance from the edge of the hatch to the center of the lockset.
- Choose a gate lock installation jig that is compatible with your lock’s backset measurement.
- Place the jig on the edge of the gate in the desired location for the lock. The jig should be centered over the door’s cross-bore hole, Which is the hole that goes all the way through the entrance.
- Clamp the jig to the entrance to hold it in place.
- Use a drill with a hole saw attachment to drill the hole for the lockset in the entrance. Make sure to use the correct size hole saw for your lockset.
- Remove the jig And use a chisel to make mortises for the lock faceplate And latch plate on the edge of the entrance.
- Hold the lockset up to the entrance to make sure it fits properly. Adjust the mortises with the chisel as needed.
- Install the lockset according to the manufacturer’s instructions, Using the screws provided.
- Test the lock to make sure it operates smoothly And securely.
Note: Make sure to also install the hinges And door knob/latch on the door before installing the lockset, As the position of these components can affect the placement of the lockset.
Step 09- Drill The Door And Assemble For The Lockset

To get started, Measure And note the location of the lockset on the edge of the hatch.
Then, Measure the backset of the lockset you want to install. The backset is the distance from the edge of the gate to the center of the lockset.
Thirdly, Use a drill with a spade bit Or hole saw attachment that matches the size of the lockset’s cross bore to drill a hole through the hatch at the marked center point. Make sure to drill straight And at the correct angle.
Fourthly, Use a chisel to make mortises for the lockset faceplate And latch plate on the edge of the gate. The faceplate mortise should be a shallow recess, While the latch plate mortise should be deeper to accommodate the latch.
Fifthly, Install the latch mechanism into the edge of the gate by inserting it into the mortise And securing it with the screws provided.
Sixthly, Insert the lock mechanism into the cross borehole from the front of the hatch, Aligning the screws with the holes on the inside of the gate. Secure the lock mechanism to the entrance with screws.
Seventhly, Slide the lockset’s faceplate onto the front of the lock mechanism And align it with the screw holes. Secure the faceplate to the entrance with screws.
Eighthly, Install the entrance knob Or lever onto the lock mechanism spindle on the inside of the hatch. Make sure it is aligned correctly And tighten the set screw to secure it in place.
Ninthly, Test the lockset to make sure it operates smoothly And securely.
Step 10- Install The Latch And Lever

To begin, Remove the old latch And lever by unscrewing them from both sides of the door. Next, Place your new latch into its designated hole on the side edge of your new entrance. Use screws to secure it in place. Make sure that you follow manufacturer instructions carefully when installing this part as different models may have slightly different methods. After installing your new latch, Insert the spindle through its center hole And align it with both sides of your gate handle assembly.
Step 11- Measure The Distance From The Edge

To install the latch And lever when replace a bedroom door, Follow these steps:
Firstly, Gather all of the necessary tools including a measuring tape, Pencil, And paper. Next, Shut the door to your bedroom And gauge its width three times, At the top, Middle, And Bottom. Take note of the smallest measurement as this will be used to determine the width of your new entrance. Next, Measure from where your existing hinges are attached to the edge of the entrance to their corresponding locations on both sides of the frame. This will make it possible for you to accurately calculate where your new hinges should be placed on the left And right sides of your new entrance.Test the latch And lever together to make sure they operate smoothly And securely.
Note: Prior to installing the latch And lever on the door, Make sure you also install the hinges because the location of the hinges can affect where to place the latch And lever.
Step 12- Put The Screws In The Hinge

By using a screwdriver to loosen the hinges, first remove the old entrance from its location. The new entrance should then position by being lined up with the frame’s hinges. Make sure the gate has enough room to open And close without running into any furniture Or walls. The hinge needs screws now, so do that. Start by putting a screw in each hinge place And tightening it until it is snug. Be careful not to tighten it too much, as this could harm the hinge And gate frame.
What Types Of Interior Doors Can We Use?
Depending on the desired style And function, a residence Or structure can use a variety of interior entrances kinds. Some of the most common types of interior doors include:
Panel Doors: These entrances are made up of flat Or raised panels that frame by stiles And rails. They are commonly use in traditional And colonial-style homes.
Flush Doors: These entrances are smooth And flat on both sides And often made from a solid core of wood Or composite material. They are commonly use in modern And contemporary-style homes.
French Doors: These entrances feature glass panels that separat by wooden mullions Or grids, And can hing to swing open in pairs. They are commonly use create a sense of openness between rooms Or to provide access to outdoor spaces.
Pocket Doors: These entrances slide into a hidden pocket in the wall when opened, making them a great space-saving option for small rooms
Or areas with limited floor space.
Bi-Fold Doors: These entrances hing in the middle And fold in half, making them a great option for closets Or storage spaces.
Barn Doors: These entrances slide along a track that mount above the gateway, And is commonly use to create a rustic Or farmhouse-style look in a home.
Dutch Doors: These entrances divide horizontally, allowing the top And bottom portions to open and closed independently. They frequently use in nurseries, kitchens, And houses with pets.
Your personal preferences, financial situation, And the particular requirements of your home Or building will all influence the kind of interior gate you select.
How Do I Remove The Old Door From The Frame?
Depending on the style of the door And frame you have, The procedure for removing an old entrance from its frame may differ, But the general procedures are as follows:
- Find the hinges by opening the door. The side of the entrance that faces the interior of the room is often where the hinges are.
- Unscrew the hinges. Using a screwdriver Or drill, Remove the screws from the hinges that attach to the gate frame. You may need a helper to hold the entrance steady as you remove the screws.
- replace a bedroom door. Once you have removed all the screws, Gently lift the gate off the hinges. Be sure to hold onto the gate securely so it doesn’t fall Or swing open.
- Inspect the frame. Check the frame’s condition after removing the gate to make sure it’s in good shape before installing a new entrance, You might need to fix Or replace the frame if it has any fractures Or other problems.
- Remove the hinge pins (if applicable). If your entrance has removable hinge pins, You can remove them by tapping them upward with a hammer And nail. This will allow you to separate the two halves of the hinge And remove the gate.
- Clean up. Once you have removed the gate, Clean up any debris Or screws left behind in the frame. This will ensure that the new entrance installation is smooth And safe.
Always take your time when removing an old entrance, And if you’re unsure about any step of the procedure, Ask a friend Or an expert for assistance.
Final Thought
To replace a bedroom door is not a difficult task And can complete in a few steps. First, remove the old entrance, along with its hinges And hardware. Next, measure the new entrance And make sure it’s the right size before moving on to installation. After that, use the shims to ensure a snug fit then secure the hinges in place And attach the doorknob Or lever. Finally, make any necessary adjustments to ensure it opens smoothly.