
Painting wardrobes Is An excellent way to refresh and transform The look Of your Bedroom Or living space. Whether You want to update An old Dresser Or add a splash of color to A new One, the process Can be both Enjoyable And rewarding. In this article, we will guide You through the steps of painting casing And Provide essential advice On understanding wardrobes paint And Choosing the right type of paint for your project.
What Is Wardrobe Paint?
Wardrobe paint is A specially formulated Color designed for use On wooden or laminate surfaces commonly found In casing. Unlike regular wall paint, wardrobe paint offers enhanced durability And adhesion To withstand daily wear and tear, making It ideal for furniture makeover projects.
Understanding Your Wardrobe’s Material
Before starting your painting project, It is essential to understand the material of your wardrobe. Some Casing are made of solid wood, while others may have laminate surfaces. Solid wood wardrobes are generally more forgiving when it comes to paint, while laminate surfaces require A bit more preparation to ensure proper adhesion.
Choosing The Right Paint:
1. Oil-Based Paint:

Oil-based paint offers excellent durability And A smooth finish, making It An Excellent choice for high-traffic areas like wardrobes. It provides A hard And protective surface that Is resistant to scratches And stains. However, Oil-based paints have A strong odour, longer drying times, And require mineral spirits For cleanup. Proper ventilation And caution Are necessary when using Oil-based Color.
2. Water-Based Paint:
Water-based paint, also known as latex Color, is a popular choice for painting wardrobes due to Its low odour, quick drying times, And easy cleanup with water. It also tends to be more environmentally friendly. While water-based Color may not be as durable as oil-based paint, choosing high-quality and durable water-based Color can still provide excellent results for your wardrobe makeover.
Preparing Your Wardrobe For Painting
1. Cleaning:
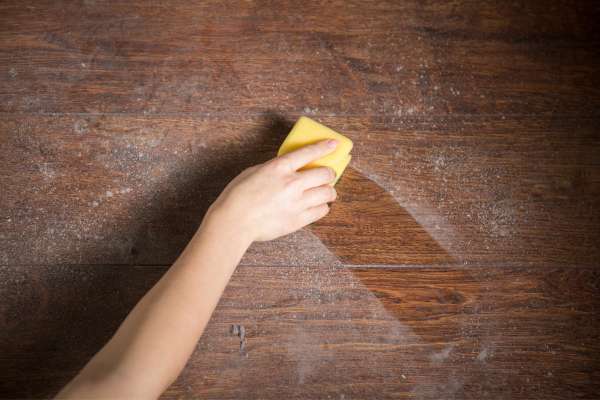
Start the preparation process by thoroughly cleaning the casing surface. Remove any dust, dirt, or grease using A mild soap And water solution. Pay special attention To areas that might have accumulated grime, such as corners And edges. After cleaning, rinse off the soap residue with clean water and allow the wardrobe to dry completely.
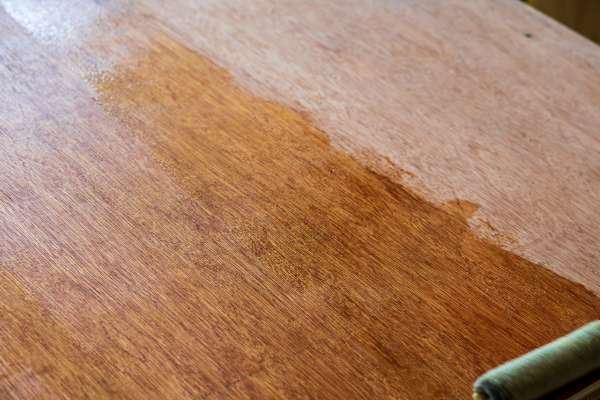
2. Sanding:

After cleaning, lightly sand the wardrobe surface to create a smooth and even texture. Sanding helps To remove any existing finish or imperfections and promotes better adhesion of the paint. Use fine-grit sandpaper or a sanding block, and sand in the direction of the wood grain. Be careful not to oversand, As this can damage the surface. Once you’ve finished sanding, use a clean cloth to wipe away any sanding dust.
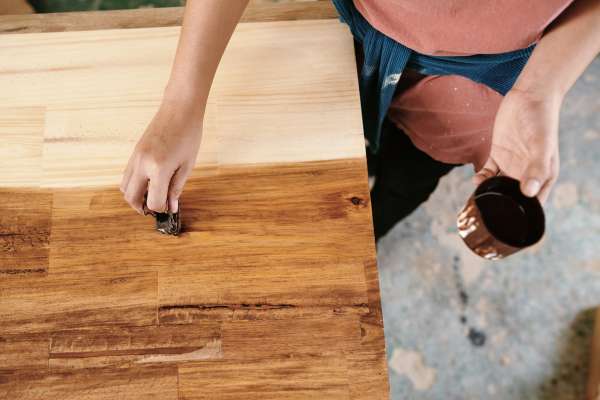
3. Priming:

For laminate or glossy surfaces, applying A primer is essential To ensure the paint adheres properly. Choose A primer that Is suitable for the type of paint you will be using. Apply the primer evenly with A brush or roller, and follow the manufacturer’s instructions regarding drying time. Priming creates A solid base for the paint, improves colour coverage, And enhances the durability of the final Color coat.
Painting Your Wardrobe
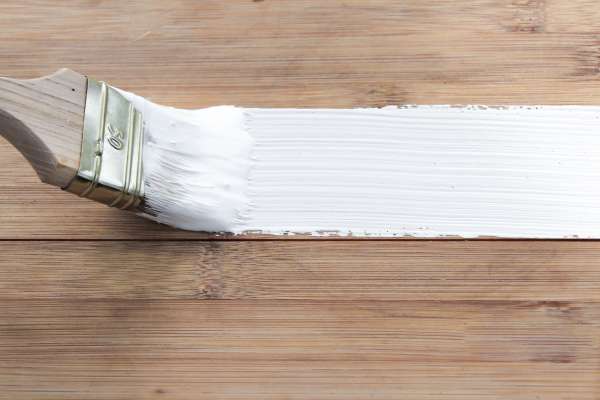
1. Applying The First Coat:
Start by applying the first coat of paint to your wardrobe. Use a high-quality paintbrush or roller To ensure even coverage. Begin with the Dresser flat surfaces, working your way from top to bottom. For the best results, use long, smooth strokes In the direction of the wood grain. Take your time to apply the Color evenly, avoiding drips or excess pooling. Allow the first coat to dry completely before proceeding to the next step.
2. Applying Subsequent Coats:
Depending on the paint type and colour, you may need to apply one or more subsequent coats to achieve the desired depth of colour and coverage. Allow each coat to dry fully before applying the next one. Sand lightly between coats to smooth out any imperfections and create a flawless finish. Multiple thin coats are often more effective than a single thick coat, ensuring a more durable and professional-looking result.
3. Adding Finishing Touches:

Once you’ve achieved the desired colour And coverage, It’s time to add finishing touches to your painted wardrobe. If you want to create a distressed or aged look, consider lightly sanding the edges or corners To reveal The wood beneath the paint. Alternatively, you can add decorative elements like stencils or decals for A personal touch. Be creative and make your Dresser a unique and stylish piece of furniture that compliments your living space
4. Caring For Your Painted Wardrobe:
To maintain the beauty And longevity of your newly painted wardrobe, proper care Is essential. Avoid placing heavy or sharp objects on the surface to prevent scratches. Clean the wardrobe with a soft, damp cloth to remove dust and dirt regularly. If needed, use A mild soap and water solution For tougher stains. Avoid harsh cleaning chemicals that may damage The paint. With proper care and maintenance, your painted wardrobe will continue To look stunning For years to come.
The Final Thoughts:
Painting your wardrobe Is A fulfilling And transformative project that allows you To express your creativity And update your living space. By applying The first coat carefully, adding subsequent coats For optimal coverage, adding unique finishing Touches, And practising proper care, you can achieve A beautifully painted wardrobe That enhances the aesthetics Of your home. Embrace the process And enjoy the rewarding results of your painted wardrobe makeover. Happy painting!