
Painting bedroom furniture can be A rewarding And cost-effective way to transform the look of your bedroom. Whether you want to revitalize old furniture Or create A completely new aesthetic, Painting allows you to unleash your creativity And customize your bedroom to suit your style. However, Before you embark on this project, It’s important to familiarize yourself with the proper techniques And materials to ensure A successful And long-lasting result. With the help of our helpful ideas And step-by-step instructions In this article, We’ll teach you how to paint bedroom furniture so you can give your bedroom decor A polished appearance. So, Let’s gather our supplies And get ready to embark on A creative journey!
Importance Of Painting Bedroom Furniture
Painting bedroom furniture holds several important benefits that can enhance both the aesthetic appeal And functionality of your bedroom. We have some key reasons why painting bedroom furniture is important:
- Personalization: Your bedroom is A personal space that should reflect your unique style And preferences. Painting your furniture allows you to customize it according to your taste, Creating cohesive And personalized bedroom decor that truly represents your personality.
- Cost-Effective Makeover: Buying new furniture can be expensive. By painting your existing bedroom furniture, You can give it A fresh new look without breaking the bank. It’s A cost-effective way to update And transform the overall appearance of your bedroom.
- Increased Durability: Painting your bedroom furniture can provide an extra layer of protection, Extending its lifespan. The paint acts as a barrier against scratches, Stains, And general wear And tear, Ensuring that your furniture remains in good condition for years to come.
- Versatility: The possibilities are endless when it comes to painting bedroom furniture. You can choose from A wide range of colors, Finishes, And techniques to achieve the desired effect. Whether you prefer A sleek modern look or A vintage-inspired charm, Painting allows you to experiment And adapt your furniture to suit various styles And themes.
- Upcycling And Sustainability: Painting old Or worn-out furniture is A great way to practice sustainable living And reduce waste. By breathing new life into your existing pieces, You contribute to A more sustainable approach to home decor, Minimizing the need for new furniture production.
- Creative Expression: Painting furniture can be A creative And fulfilling endeavor. It provides an opportunity to unleash your artistic side, Experiment with different colors And techniques, And express your individuality through your bedroom design.
In summary, Painting bedroom furniture offers numerous benefits, Including personalization, Cost-effectiveness, Durability, Versatility, Sustainability, And creative expression.
What Is A Bedroom Furniture Paint?
Bedroom furniture paint is A type of paint specifically designed for use on bedroom furniture. This type of paint is usually water-based And has A low odor, Making it ideal for use in the bedroom. It also provides A durable finish that will resist chipping, Scratching, And fading over time. This type of paint is available in A wide variety of colors And finishes, Allowing you to customize your bedroom furniture to match your decor. Additionally, This type of paint can be used on both wood And metal surfaces, Making it versatile enough to use on any type of bedroom furniture. With the right preparation And application techniques, You can create A beautiful look that will last for years to come. When selecting A bedroom furniture paint, It’s essential to read the manufacturer’s instructions And consider the specific requirements of your furniture material. Some paints may require A primer Or specific surface preparation, So be sure to follow the recommended guidelines to achieve the best results.
The Benefit Of Bedroom Furniture Paint
The use of bedroom furniture paint offers several benefits that contribute to the overall appearance And longevity of your furniture. Here are some key benefits of using bedroom furniture paint:
- Bedroom furniture paint allows you to transform the look of your furniture, Giving it a fresh And updated appearance.
- Painting your bedroom furniture gives you the freedom to customize it according to your personal style And preferences. Whether you prefer a classic, Rustic, Modern, Or eclectic look, You can achieve it by selecting the right paint color And finish.
- Applying paint to bedroom furniture provides a protective layer that helps shield it from everyday wear And tear.
- If you have older Or worn-out furniture, Painting it can breathe new life into the pieces. It allows you to restore their appearance, Covering up any imperfections Or signs of aging.
- Bedroom furniture paint can be used on various types of furniture materials, Such as wood, Laminate, metal, Or even plastic. This versatility allows you to paint a wide range of furniture pieces, Including dressers, Nightstands, Bed frames, Wardrobes, And more.
- Painting your existing bedroom furniture is generally more cost-effective than buying new pieces. It saves you money while still allowing you to achieve the desired look And style.
- Painted furniture is generally easier to clean And maintain compared to bare wood Or other materials. Most bedroom furniture paints can be wiped clean with a damp cloth, Making it convenient to keep your furniture looking fresh And tidy.
Bedroom furniture paint offers benefits such as enhanced aesthetics, Customization, Protection, restoration, Versatility, Cost-effectiveness, And easy maintenance.
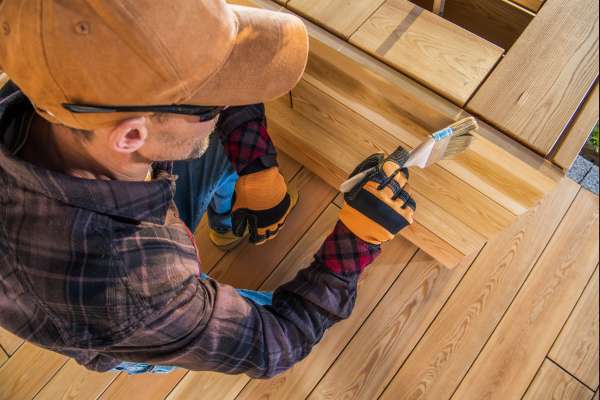
Preparing The Furniture For Painting

1. Assessing The Condition Of The Furniture
Before you begin painting your bedroom furniture, it’s important to assess its condition. Here’s have some steps that you should consider:
- Structural Integrity: Examine the furniture for any structural issues, such as loose joints, cracks, or wobbly parts.
- Surface Damage: Inspect the furniture’s surface for any scratches, dents, or imperfections. Note any areas that require extra attention or repairs. Small surface imperfections can be smoothed out during the sanding process, but larger damages may need more extensive repairs.
- Previous Finishes: Determine if the furniture has any previous finishes, such as varnish, paint, or stain.
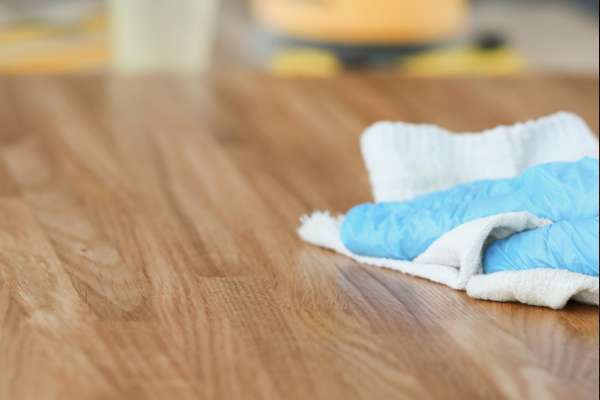
2. Cleaning The Furniture Surface
Cleaning ensures that the paint adheres properly And helps remove any dirt, Oils, Or residues. Follow these steps:
- Remove Dust: Use a soft cloth Or a vacuum cleaner with a brush attachment to remove any loose dust Or debris from the furniture’s surface And crevices.
- Gentle Cleaning: Prepare a mild solution of warm water And a gentle detergent.
- Rinse And Dry: After cleaning, Rinse the furniture surface with clean water to remove any detergent residue.
3. Removing Hardware Or Accessories
To ensure a smooth painting process and prevent accidental paint spills Or drips, it’s best to remove any hardware or accessories from the furniture. Follow these guidelines:
Unscrew Or Remove: Use appropriate tools to unscrew knobs, handles, hinges, Or any other removable hardware from the furniture.
Remove Non-Removable Accessories: For accessories Or decorative elements that cannot be easily detached, such as decorative trim Or appliques, consider using painter’s tape Or masking tape to cover and protect them from paint.
4. Sanding The Furniture
Sanding helps create A slightly rough texture, allowing the paint to adhere better And providing a smoother finish. Follow these steps:
- Choose the Right Sandpaper: Select sandpaper with medium to a fine grit (around 120 to 220) for most furniture surfaces.
- Sanding Technique: Sand the furniture surface in the direction of the wood grain Or in even strokes for non-wood surfaces.
- Remove Sanding Dust: After sanding, use a clean cloth Or a vacuum cleaner with a brush attachment to achieve a smooth and uniform surface.
Choosing The Right Paint And Tools

1. Selecting The Appropriate Paint Type
Choosing the right paint type is crucial for achieving a durable And professional-looking finish on your bedroom furniture. Consider the following options:
Latex Or Acrylic Paint: Latex Or acrylic-based paints are popular choices for painting furniture.
Chalk Paint: Chalk paint has gained popularity for its matte, vintage-like finish.
Milk Paint: Milk paint gives furniture a smooth And matte finish.
Oil-based Paint: Oil-based paints offer excellent durability And adhesion.
2. Considering Color And Finish Options
The color And finish of your painted furniture play A significant role in the overall look of your bedroom. Consider the following factors:
- Color Scheme: Decide on the color scheme that aligns with your bedroom decor. Choose A color that complements Or contrasts with the existing elements in the room.
- Finish: Different paint finishes, Such as matte, Satin, Semi-gloss, Or high-gloss, Can significantly impact the final appearance of your furniture.
3. Gathering Necessary Painting Tools And Equipment
To ensure A smooth And efficient painting process, Gather the following tools And equipment:
- Brushes,
- Rollers,
- Paint Trays,
- Painter’s Tape,
- Sandpaper,
- Drop Cloths or Plastic Sheets,
- Cleaning Supplies.
4. Ensuring Proper Ventilation And Workspace Setup
Proper ventilation is essential during the painting process to ensure good air circulation And minimize the inhalation of fumes. Consider the following tips:
- Work in a well-ventilated area, such as an open garage Or a room with windows And doors for fresh air circulation.
- If ventilation is limited, consider using fans Or opening windows to create airflow.
- Set up your workspace by laying down drop cloths Or plastic sheets to protect the floor And surrounding furniture.
- Arrange your furniture piece on a stable surface, such as a workbench Or sturdy table, at a comfortable height for easy access And maneuverability.
- Ensure good lighting in your workspace to accurately see the details of your furniture while painting.
- If working with oil-based paints Or in an area with limited ventilation, consider using a respirator mask to protect yourself from fumes.
- Keep fire safety in mind. Avoid working near open flames Or heat sources, And properly dispose of any paint-soaked rags to prevent the risk of combustion.
By considering these factors And setting up a suitable workspace, you can ensure a safe And productive environment for your painting project.
Applying Primer
1. Choosing The Appropriate Primer Type
Priming your bedroom furniture before painting is an essential step that enhances adhesion, promotes even coverage, And improves the longevity of the paint job. When selecting a primer, consider the following options:
- All-Purpose Primer: An all-purpose primer is suitable for most furniture materials, such as wood, laminate, metal, Or plastic. It provides good adhesion And helps to block stains Or discoloration.
- Stain-Blocking Primer: If your furniture has existing stains, watermarks, Or discoloration, consider using a stain-blocking primer. This type of primer helps to prevent stains from bleeding through the paint And ensures a clean And uniform surface.
- Bonding Primer: Bonding primers are specifically designed to adhere well to challenging surfaces, such as glossy Or non-porous furniture materials. They provide a strong bond between the furniture And the paint, improving adhesion And durability.
- Wood Primer: If your furniture is made of bare wood Or has a lot of exposed wood grain, using a wood primer can help seal the surface And create a smoother finish. Wood primers also prevent tannin bleed-through from the wood, ensuring a consistent paint color.
2. Applying Primer To The Furniture
Once you have selected the appropriate primer, follow these steps to apply it to your bedroom furniture:
- Prepare the Furniture: Ensure the furniture surface is clean And dry. Remove any dust, dirt, Or debris using a clean cloth Or vacuum cleaner.
- Stir And Prep the Primer: Stir the primer thoroughly with a stir stick to ensure an even consistency.
- Apply the Primer: Use a brush, roller, Or paint sprayer to apply the primer to the furniture surface.
- Pay Attention to Details: Ensure that the primer reaches all nooks, corners, And intricate details of the furniture.
- Smooth Out And Level: After applying the primer, gently brush over the surface to smooth out any brush strokes Or drips, ensuring an even And uniform finish.
3. Allowing Sufficient Drying Time
Proper drying time is crucial for the primer to bond well to the furniture surface And provide a solid foundation for the paint. Follow these guidelines:
- Refer to the manufacturer’s instructions for the recommended drying time of the primer. This can vary depending on the type of primer used.
- Allow the primer to dry completely before moving on to the next steps. This typically takes anywhere from 1 to 24 hours, Depending on the primer And environmental conditions.
- Avoid rushing the drying process to prevent the primer from being tacky Or not fully cured. Proper drying ensures better adhesion And a smoother paint application.
- Consider the temperature And humidity in your workspace, As they can affect drying times. Optimal drying conditions include moderate temperatures And low humidity.
- You create a solid foundation for the paint And enhance the overall quality And durability of your painted bedroom furniture.
Painting Techniques And Tips

1. Brushing Vs. Spraying Techniques
When it comes to painting bedroom furniture, You have the option to use either brushing Or spraying techniques. Consider the following factors when deciding which technique to use:
Brushing: Brushing is A traditional And versatile method that allows for greater control And precision.
Spraying: Spraying can provide A smooth And professional finish, Especially for large, Flat surfaces.
2. Applying Paint Evenly And Smoothly
Achieving an even and smooth paint application is key to a professional-looking finish. Consider the following tips:
- Use the Right Tools: Select high-quality paint sprayers appropriate for your chosen paint type. Quality tools help ensure smoother application and minimize brush strokes or spray lines.
- Proper Loading: Load the brush or sprayer with an adequate amount of paint without overloading it. This helps prevent drips or excess paint buildup.
- Apply Thin Coats: Instead of applying thick coats of paint, opt for multiple thin coats. Thin coats dry faster and allow for better control and coverage, resulting in a smoother finish.
- Work in Small Sections: Divide your furniture into manageable sections and work on one section at a time. This prevents the paint from drying before you can blend it properly.
- Smooth Out Brush Strokes: If using a brush, lightly brush over the painted surface in long, even strokes to minimize brush marks. Work quickly and avoid going back over areas that have started to dry.
3. Dealing With Brush Strokes Or Spray Lines
Even with the best techniques, some brush strokes or spray lines may be visible. Here’s how to minimize their appearance:
- Brush Strokes: If brush strokes are visible, lightly sand the painted surface with fine-grit sandpaper once it’s fully dried. This helps smooth out any raised brush strokes.
- Spray Lines: To reduce spray lines, ensure proper spraying technique and maintain consistent distance and speed while spraying. Apply thinner coats and overlap each pass slightly to blend the paint.
4. Using Multiple Thin Coats For Better Results
Rather than applying a single heavy coat of paint, it’s recommended to use multiple thin coats. Here’s why:
- Improved Adhesion: Thin coats adhere better to the surface, ensuring a stronger bond And reducing the risk of peeling Or chipping.
- Smoother Finish: Thin coats dry faster And allow for better self-leveling, resulting in a smoother And more even finish.
- Easier Corrections: Applying thin coats allows you to identify And address any imperfections Or inconsistencies early on. You can easily sand Or touch up specific areas without disturbing the entire paint job.
5. Ensuring Proper Drying Time Between Coats
Allowing sufficient drying time between coats is crucial for achieving a durable And flawless finish. Consider the following guidelines:
- Refer to the manufacturer’s instructions for the recommended drying time between coats.
- Avoid rushing the drying process to prevent smudging, streaking, or lifting of the previous coat.
- Consider temperature And humidity: Cooler temperatures And higher humidity levels can extend the drying time. Ensure the workspace has proper ventilation And maintain optimal temperature And humidity conditions for faster drying.
- Lightly sand between coats: If necessary, lightly sand the surface between coats using fine-grit sandpaper. This helps create a smooth surface for the next coat to adhere to.
- Clean brushes or sprayers between coats: If you’re using brushes, clean them thoroughly between coats to prevent dried paint from affecting the application. For sprayers, follow the manufacturer’s instructions for cleaning And maintenance.
- Taking the time to allow each coat to dry properly ensures a more professional And durable finish for your painted bedroom furniture.
Adding Finishing Touches

1. Applying Additional Coats, If Necessary
After allowing each coat to dry properly, Assess the coverage And appearance of your painted bedroom furniture. Depending on the desired finish And the opacity of the paint, You may need to apply additional coats. Here’s what you should consider:
Coverage: If the previous coats have provided full coverage And the desired color intensity, Additional coats may not be necessary.
Evenness: Evaluate the surface for any uneven areas, Brush marks, Or imperfections. Additional coats can help smooth out these issues And create a more polished look.
Drying Time: Ensure you allow sufficient drying time between each additional coat.
Technique: Maintain consistent application techniques, Such as using the same brush Or sprayer method, To ensure uniformity throughout the project.
2. Considering Decorative Techniques (E.G., Distressing, Antiquing)
Some popular options include distressing, Antiquing, Or creating a vintage or aged appearance. Here are a few techniques to explore:
- Distressing: Distressing involves intentionally creating worn or aged areas on the furniture surface. This can be achieved by lightly sanding edges, Corners, Or raised areas where natural wear would occur. You can also use tools like a hammer, Chain, Or sandpaper to create dents, Scratches, Or small holes.
- Antiquing: Antiquing adds a vintage or antique look to your furniture by applying a glaze or darkening agent to highlight crevices And details. After the final coat of paint is dry, Apply the glaze or antiquing solution using a brush or cloth, And then gently wipe away the excess to achieve the desired effect.
- Layering Colors: Experiment with layering different paint colors to create depth And dimension. Apply a base coat, Let it dry, And then use a dry brush or sponge to apply a lighter or darker shade over the top, Focusing on raised areas or details. This technique adds visual interest And texture to the furniture.
Take your time, Be creative, And enjoy the process of transforming your bedroom furniture into a unique piece that reflects your personal style.
3. Protecting The Paint With A Clear Topcoat
To ensure the longevity And durability of your painted bedroom furniture, consider applying a clear topcoat Or sealer. Here’s why it’s beneficial:
- Protection: A topcoat provides an extra layer of protection for the painted surface, guarding against scratches, stains, And daily wear And tear.
- Durability: The topcoat enhances the paint’s resistance to fading, chipping, And peeling, extending the life of your painted furniture
- Finish Enhancement: Depending on the desired look, you can choose a topcoat with a matte, satin, Or glossy finish to enhance the appearance of the painted surface.
- Easy Maintenance: A topcoat makes cleaning And maintaining your painted furniture easier by providing a smooth And wipeable surface.
Select a topcoat specifically formulated for furniture painting And follow the manufacturer’s instructions for application.
4. Reattaching Hardware And Accessories
After the paint has dried And the final touches are complete, it’s time to reattach the hardware And accessories to your bedroom furniture. Follow these steps to ensure a proper And secure installation:
- Clean And Inspect
- Align And Position
- Secure with Screws Or Nails
- Test And Adjust
- Install Accessories
Remember, always handle hardware And accessories with care to prevent any scratches Or damage to freshly painted surfaces.
Cleaning Up And Maintenance
1. Properly Disposing Of Used Materials
The paint is designed to provide an even And smooth finish while also protecting the wood from moisture And other elements. Proper disposal of bedroom furniture paint involves following some basic guidelines.
Firstly, it’s important to ensure that any excess Or unused paint is disposed of properly. This means avoiding pouring it down the drain Or throwing it in the garbage bin, which can have harmful environmental effects. Instead, consider donating the leftover paint to local charities Or community organizations in need of supplies for future projects.
Secondly, if you’re discarding a piece of painted bedroom furniture, ensure that you dispose of it responsibly as well.
2. Cleaning Paint Brushes And Tools
Before we delve into the proper cleaning techniques, Let’s first understand what exactly bedroom furniture paint is. It is A type of paint specifically formulated for painting wooden Or metal furniture found in bedrooms, Such as dressers, Nightstands, Or bed frames.
Now that we know what bedroom furniture paint is, It’s time to learn how to clean our tools effectively.
Always use the appropriate solvent for the type of paint you are using. For example, If you’re using oil-based paints, Use mineral spirits to clean your brushes And rollers; water-based paints require water And soap. Additionally, Never let your tools dry out before cleaning
them – this can set the paint in place And render them unusable.
3. Regular Maintenance To Preserve The Painted Furniture
Regular maintenance is important to preserve the painted furniture, especially in the bedroom where it is often exposed to dirt, dust, And humidity. Bedroom furniture paint is a type of coating that provides an aesthetic appeal And protection against wear And tear. It can be applied on any wooden Or metal surface to enhance its beauty And longevity.
Each type has its own advantages And disadvantages with regard to durability, coverage, drying time, And ease of application. It is important to choose the right type of paint for your specific needs based on factors such as the amount of use the furniture receives Or if it’s in a child’s room where there may be more likelihood of spills Or scratches.
The Final Thoughts
In conclusion, Painting your bedroom furniture is a simple And cost-effective way to give your space a fresh new look. The process may seem daunting, But with the right tools And techniques, It can be completed in just a few steps. Remember to properly prepare your furniture before painting, Use high-quality paint And apply it in thin coats. Don’t forget to allow ample drying time between coats And protect your newly painted surfaces from scratches Or damage. By following these tips, You’ll have beautiful, Customized bedroom furniture that reflects your style And personality. Your bedroom will thank you for the upgrade!