
This step-by-step article will guide you through the procedure of whether you want to replace An outdated door Or give your hang bedroom a new look. Although hanging A door might appear difficult, You can complete the process with confidence if you have the correct equipment, Supplies, And guidance.
We’ll go through everything in this guide, From measuring And choosing the appropriate door to getting the door frame ready, Installing the hinges, And installing the door itself. We’ll go over the equipment And supplies you’ll need, As well as provide advice on how to speed up And improve the process.
Remember, Hanging A door requires precision And attention to detail. By following the steps outlined in this guide, You’ll be able to achieve professional-looking results And enjoy a well-hung, functional bedroom door in no time.
What Tools Are Needed To Hang A Bedroom Door?
Creating a cozy And inviting atmosphere in your bedroom starts with the right door. Hanging a bedroom door decorating may seem like a complex task, But fear not!
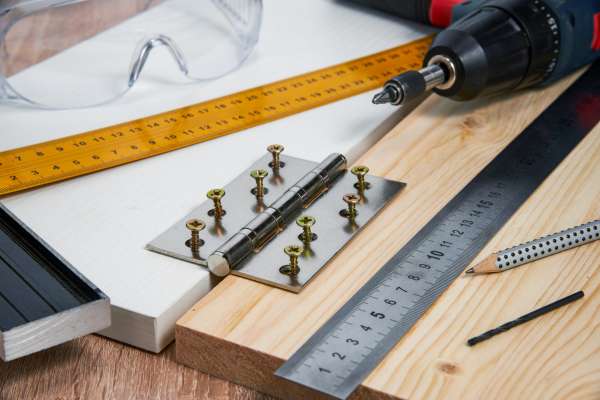
To hang a bedroom door, You will need the following tools:
- Tape Measure: Essential for accurately measuring the dimensions of the door frame And the door itself. This will ensure a proper fit.
- Pencil: Used for marking measurements And guidelines on the door And door frame.
- Screwdriver: Needed to remove the existing door And hinges, As well as to attach the new door And hinges. Depending on the type of screws used, You may require a Phillips Or flathead screwdriver.
- Chisel: Used for creating recesses in the door frame to accommodate the hinges. It helps ensure a flush And secure fit.
- Hammer: Used for minor adjustments, Tapping in nails, And securing the hinges And other hardware.
- Drill: Necessary for drilling pilot holes for screws And installing door hardware, Such as doorknobs And latch plates.
- Wood Plane Or Sandpaper: Helps in shaving Or smoothing down any rough edges Or high spots on the door Or door frame, ensuring a proper fit.
- Level: Ensures that the door is hung straight And level, preventing it from swinging Or sticking.
- Hacksaw Or Power Saw: Used to trim the door to the correct height Or width, if needed.
- Safety Equipment: It’s always a good idea to wear safety glasses And gloves when handling tools And working with doors, as it helps protect you from potential hazards.
Having these tools readily available will make the process of hanging a bedroom door much more manageable And efficient.
Here Are Some Instructions For How To Hang A Bedroom Door
This step-by-step manual will demonstrate how to update An old door Or give your bedroom A fresh look.
Step 01- Gather Necessary Tools And Materials

To hang a bedroom door, you’ll need the following tools And materials:
Tools:
- Tape Measure
- Pencil
- Screwdriver (Phillips Or flathead, depending on the screws)
- Chisel
- Hammer
- Drill
- Wood Plane Or Sandpaper
- Level
- Hacksaw Or Power Saw
- Safety Glasses
- Gloves
Materials:
- Bedroom Door: Choose a door that matches your desired style And dimensions. Ensure it fits the door frame properly.
- Door Hinges: Select hinges that are appropriate for the door’s weight And size. Three hinges typically used for a standard bedroom door.
- Screws: Get screws that are suitable for attaching the hinges And securing the door in place. Check the recommended screw size for the hinges.
- Door Knob And Lockset: If you’re replacing an old door, you can reuse the existing hardware. Otherwise, purchase a door knob And lockset that suits your preference.
- Shims: These small pieces of wood Or plastic help to level the door within the frame.
- Wood Filler: Used to fill any gaps Or holes in the door frame Or door after installation.
- Finishing Materials: Depending on your desired finish, you may need paint, stain, varnish, Or other finishing products for the door And frame.
By gathering all the necessary tools And materials beforehand, you’ll be well-prepared to hang your bedroom door efficiently And achieve a professional result.
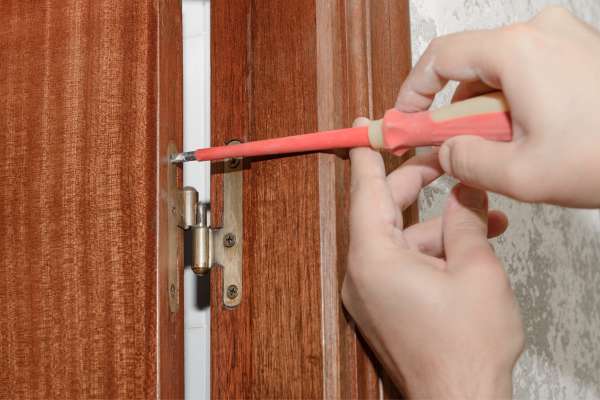
Step 02- Remove The Old One in The Doorway To Hang Your Bedroom Door

To remove the old door from its hinges. You’ll need A screwdriver to do this. Start by removing the screws from the top hinge, Followed by the bottom hinge. Once all screws removed, Gently lift the door off of its hinges And set it aside.
Next, Measure your doorway to determine what size door you’ll need. This will ensure that your new door fits perfectly in place of your old one. Purchase A pre-hung interior door that matches your style And preferences.
Step 03- Measure The Width And Height

You must precisely measure the door frame’s width And height before hanging a bedroom door. To get the right measurements, Follow these steps:
Width Dimensions:
- The width of the door frame should first measured at the top, Center, And bottom.
- Measure the distance with a tape measure between the inside edges of the frame’s left And right sides.
- Take note of the narrowest measurement among the three.
- This narrowest measurement will be the width of the door you need to purchase Or trim if necessary.
Height Measurement:
- The left, right, And center heights of the door frame should all measured.
- Measure from the inside edge’s top with the tape measure all the way to the ground Or the frame’s bottom.
- Record the shortest measurement among the three.
- This shortest measurement will be the height of the door you need to purchase Or trim if required.
To achieve a precise fit for the new door, remember to measure the width And height from the inner edge of the door frame.
Once you have the width And height measurements, you can proceed to select a door that matches these dimensions Or make necessary adjustments if the door needs to trimmed. Remember to account for any additional clearance Or gap you desire between the door And the frame.
Take your time And double-check your measurements before continuing with the installation process because accurate measurements are essential for ensuring a correctly fitting door.
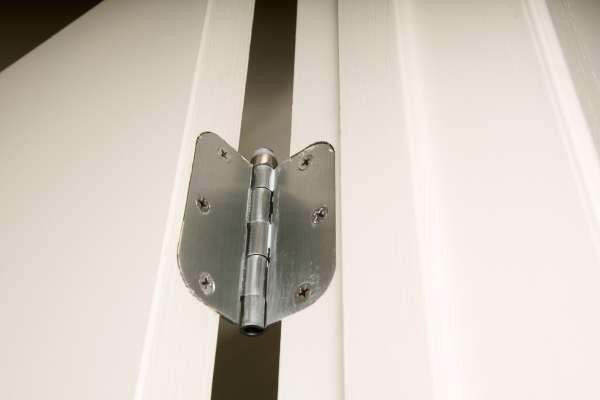
Step 04- Make the hinge space
A chisel, Hammer, And screwdriver are a few basic tools you’ll need to create hinge space. Start by measuring where you want your hinges to go on both the door And frame using a ruler Or tape measure. Next, Use a pencil to mark these locations on both surfaces. Once you have your markings in place, Use your chisel to remove any excess wood in the hinge space area until it’s flush with the surface of the frame or door.
Step 05 – Screw The Hinges Onto The Door Using The Provided Screws
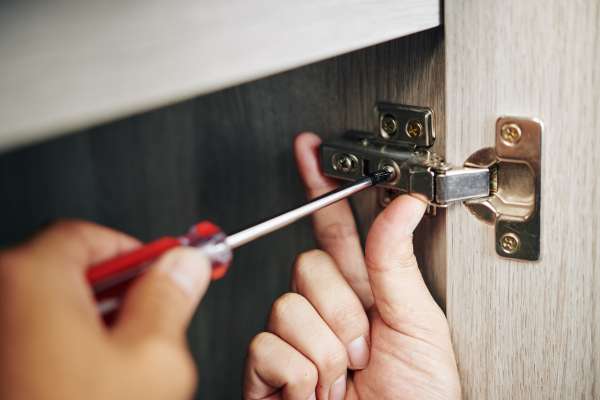
To hang your bedroom door correctly ensure that you have all the necessary tools required for this task. You will need a drill Or screwdriver, Screws that are provided in the package, And measuring tape to ensure accuracy in measurements. Before screwing the hinges into place, Check that they aligned with the hinge cutouts on your door frame. Once your hinges properly aligned, Begin by securing each hinge to the door frame by screwing one into each hinge hole. Afterward, Check if everything leveled out And adjust accordingly before adding in additional screws as needed.
Step 06 – Hold The Door In Place And Use A Pencil To Mark The Hinge Outlines On The Door Frame

To mark out the hinge outlines on the door frame you can ensure that your hinges placed correctly And that your door will sit properly when closed.
To mark out this you have to hold the door in place where you want it to hang. It’s essential to have someone assist you with this part of the process as doors can be heavy! Use wedges Or shims to keep the door level while you work. Once your door is in place, use A pencil to mark out where each hinge will go on the frame.
When marking out your hinges, be sure to measure twice And cut once. You don’t want to make any mistakes Or end up with An unevenly hung door!
Step 07 – Install The Hinges Onto The Door Frame Using The Provided Screws

Installing hinges will ensure that your door is securely attached to the frame And will open And close smoothly.
Make sure you have the correct tools on hand before beginning to install hinges, Including A drill, Screwdriver, Measuring tape, Level, And A pencil. Start by positioning one hinge where you want it on top of the door frame. Use your pencil to mark where each screw should go on both the hinge And frame. Then use your drill to create pilot holes for each screw.
After that, To fasten the hinge to the frame, Insert one screw at A time into each corner of the hinge.
Step 08 – Hold The Door In Place And Check That It Swings Open And Closed Smoothly
To check that it swings open And closed smoothly you have to hold the door in the place where you want it installed. Make sure there’s enough space for the hinges as well as clearance for opening And closing. Once that’s figured out, mark where each hinge will go on both the frame And the door using a pencil. Next, chisel away some wood on each marking to create shallow recesses for your hinges to fit into.
Step 09 – Use A Drill To Create A Hole To Hang Your Bedroom Door

To use A drill to create A hole you have to choose the right type of drill bit for your project. For creating holes in wooden doors Or frames, A standard wood drill bit will work well. However, if you’re drilling into metal Or masonry, then you’ll need specific bits designed for those materials.
Once you have your correct bit selected, mark the spot where you want to create the hole with A pencil o
Or marker pen. Then clamp down your door securely on A stable surface before starting to drill.
Remember to wear safety goggles And gloves when using power tools like drills as they can produce flying debris.
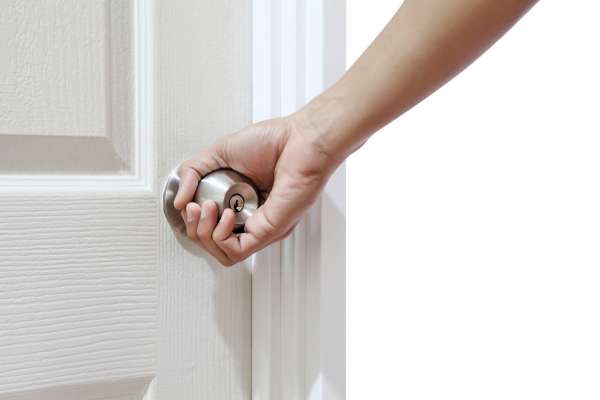
Step 10 – Install The Door Knob Or Handle
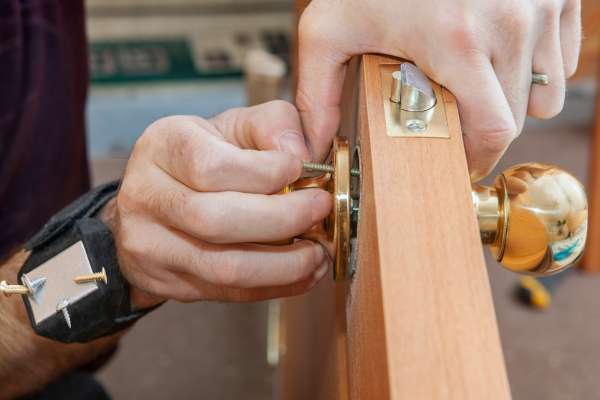
To install the door knob or handle you have to choose your door knob or handle based on your personal preference and style. Make sure the hardware you choose fits the thickness of your door. Next, locate the spot where you want to place the hardware on both sides of the door. Mark those spots with a pencil or use an installation template that came with your hardware kit. Now it’s time to drill holes for the screws that will hold the hardware in place. Use a drill bit that matches the size of your screws so they fit snugly without wobbling around once installed.
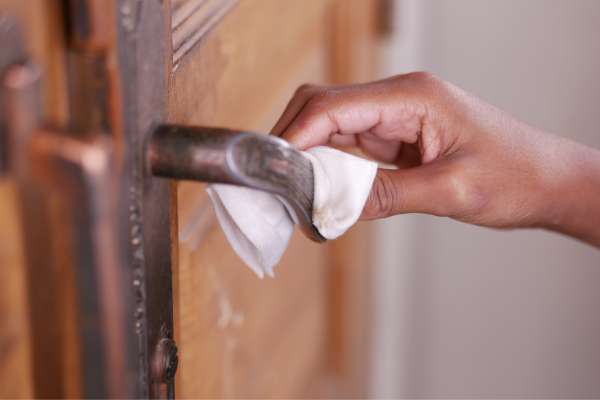
Step 11 – Use Sandpaper To Smooth Any Rough Edges

Eliminating any sharp edges on the door frame is A crucial step in this procedure.
Make sure your door frame is initially clear of all dirt And debris. Use sandpaper to smooth off any rough edges Or uneven surfaces after cleaning the frame. Be sure to move the sandpaper in one direction only so as not to create more scratches Or damage. You may also want to use wood filler for any larger gaps Or holes in the frame.
Next, Place your hinges onto the frame where you want them positioned, And mark their locations with pencil lines.
Step 12 – Add Any Additional Hardware To Hang Your Bedroom Door
Once you have your supplies ready, Start by attaching the hinges to the door using screws. Make sure that they are evenly spaced And aligned properly before tightening them down completely. Next, hold up the door to the frame so that you can mark where each hinge needs to be attached. Use your level to ensure that everything is straight And even before drilling pilot holes for each screw.
Step 13 – Check That The Door Is Level And Plumb Using A Level
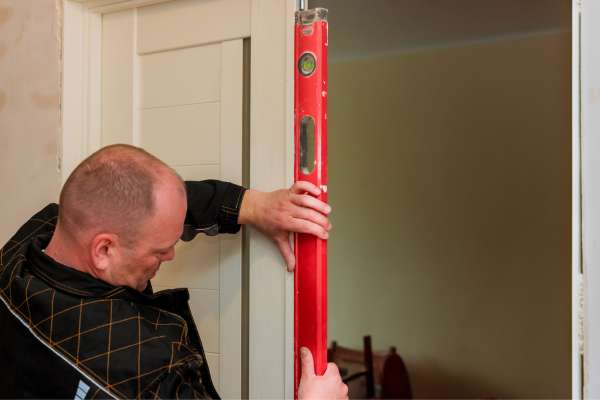
A level tool is essential in checking if your door is installed straight and even. Before beginning, make sure that you have all the necessary tools within reach such as screws, screwdriver, power drill, hammer, nails, chisel, circular saw or hand saws, and of course a reliable spirit level. Once you have all the materials ready, start by placing the level on top of the door slab horizontally and then vertically to ensure that it’s perfectly leveled.
If you notice any discrepancies in terms of leveling or plumbing after installing your bedroom door then adjustments need to be made immediately.
Step 14 – Add Shims Or Adjust The Hinges As Necessary

Add shims Or adjust the hinges you have to make sure you have all the necessary tools And materials, including a drill, screws, shims, And a level. Start by removing the old door if there is one. To be sure your new door will fit properly, measure the doorway’s height And breadth next.
Place shims on either side of the doorway once your new door is prepared to hang in order to hold it in place while you screw it into place. Use a level to make sure the door is straight before tightening everything down.
Step 15- Fill Any Gaps Or Holes With Wood Putty Or Spackle
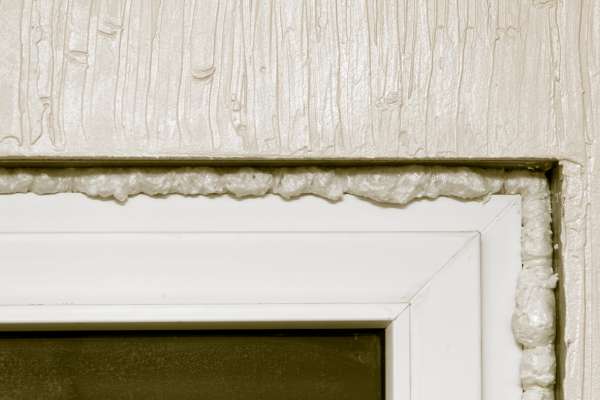
To ensure your door fits snugly, It’s essential to fill these gaps with wood putty Or spackle.
Start by determining the size of the gap Or hole you need to fill. Use a measuring tape to get accurate measurements And purchase a container of wood putty that matches your door’s color. Apply the putty generously into each gap using a putty knife And smooth it out as much as possible.
Allow the putty to dry completely before sanding down any excess material with sandpaper. If you notice any remaining gaps after sanding, Apply another coat of putty until all gaps are filled.
Step 16- Reinstall Any Baseboards Or Trim

To reinstall baseboards Or trim you have to start by measuring the length needed for each piece And cutting it to size using a saw. Make sure to wear protective gear such as gloves And goggles while cutting. Use a nail gun Or hammer And nails to secure the baseboard Or trim it back into place, making sure it is level with adjacent pieces. Once all baseboards And trim have been reinstalled, you can move to hang your bedroom door.
Remember to measure twice before making any cuts Or adjustments to ensure proper fitment.
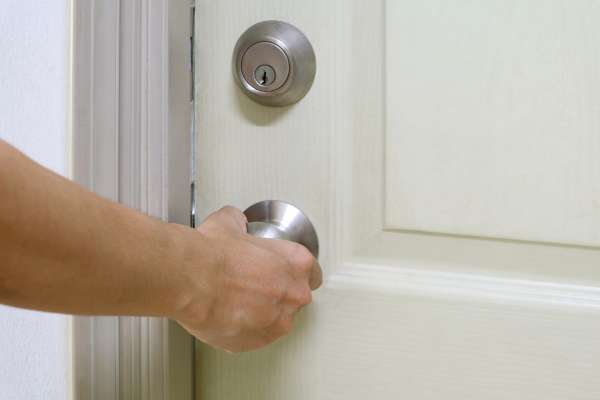
Step 17- Test The Door Again To Ensure It Opens And Closes Smoothly
You must first open And close your bedroom door numerous times to ensure that it swings open And shut easily on its hinges. If there is any resistance Or dragging, you might need to sand down the door’s edges Or adjust the hinges to make A better fit. Try opening And closing the door once more to determine if anything has changed after making any necessary modifications.
If your bedroom door still doesn’t open And closes smoothly after making adjustments, You may need to enlist some help from A professional carpenter Or handyman.
Step 18- Make Any Final Adjustments As Needed
To make any final adjustments as needed at first thing you’ll want to do is check that the door fits properly in the frame. If it’s too tight or too loose, you can adjust it by removing one of the hinge pins and tapping it up or down with a hammer until you get the perfect fit. You should also check that the gaps around the top and sides of the door are even. If they’re not, use shims to adjust them until they are.
Next, test out your handle and latch mechanism to make sure they work smoothly. If there’s any binding or sticking, you may need to adjust their position slightly.
Step 19- Clean Up Any Debris Or Sawdust
To make any final adjustments as needed at first thing you’ll want to do is check that the door fits properly in the frame. By removing one of the hinge pins And hammering it up Or down until it fits exactly, you can modify it if it’s too tight Or too loose. Additionally, make sure the spaces at the top And sides of the door are uniform. If they’re not, use shims to adjust them until they are.
Next, test out your handle And latch mechanism to make sure they work smoothly. If there’s any binding Or sticking, you may need to adjust their position slightly.
Step 20- Dispose Of The Old Door And Frame Properly

we’ll discuss some safe ways to get rid of your old door and frame. One option is to donate your old door and frame to a local charity or reuse center. This not only helps the environment by reducing waste but also benefits those in need of affordable housing supplies. Another option is to bring the materials to a recycling center that accepts wood products. This ensures that the door and frame will be properly disposed of without contributing to landfills or other harmful waste sites. Once you’ve taken care of disposing of your old door and frame, it’s time for installation.
Conclusion
In conclusion, To hang a bedroom door doesn’t have to be a daunting task. With the right tools, Materials, And guidance, You can successfully install a new door And enhance the aesthetics And functionality of your bedroom. Our comprehensive guide provides step-by-step instructions, Tips, And techniques to ensure a professional And satisfying result. From measuring And preparing the door frame to attaching hinges And completing the installation, You’ll gain the knowledge And confidence to tackle this project with ease. Say goodbye to that old door And hello to a fresh new look for your bedroom. Start your door-hanging journey today!