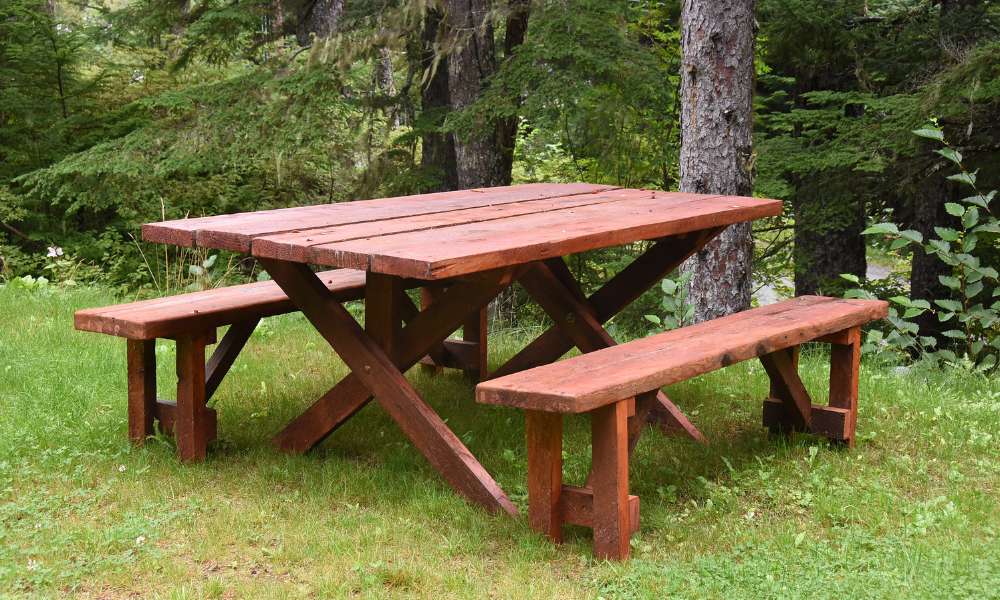
Outdoor gatherings are often enhanced by the presence of a sturdy and functional picnic table. A picnic table with separate benches offers versatility, Accessibility, And independent use, Making it an ideal addition to any backyard or outdoor space. This step-by-step guide will equip you with the knowledge and skills required to construct a durable How To Build A Picnic Table With Separate Benches, transforming your outdoor space into a hub for memorable gatherings.
Planning and Preparation
Planning and Preparation are the foundation of any successful project, And building a picnic table with separate benches is no exception. Here’s a step-by-step guide to ensure your project’s success:
1. Selecting the Right Location:
Begin by carefully selecting the perfect location for your picnic table. Consider factors such as the amount of shade, proximity to amenities, and level ground. Choosing an ideal spot ensures that your picnic area will be comfortable and easily accessible.
2. Design Considerations:
Once the location is determined, move on to design considerations. Plan the dimensions of your picnic table, bench placement, And overall design to match your preferences and the surrounding environment. This step is crucial for creating a functional and visually appealing outdoor centerpiece.
3. Gathering Materials and Tools:
With your design in mind, gather all the necessary materials and tools. You’ll need high-quality, weather-resistant wood, stainless steel fasteners, a protective wood finish, Wood glue and optional paint or stain for customization. Equip yourself with essential tools, including a circular saw, electric drill, measuring tape, clamps, Galvanized nails or screws, screwdriver, sandpaper, Level And safety equipment such as goggles and gloves.
4. Safety Precautions:
Safety should always be a top priority. Before you start construction, don appropriate safety gear, including safety goggles and gloves. Familiarize yourself with each tool’s operating instructions and take precautions to prevent accidents during the building process. Prioritizing safety throughout the project ensures that it proceeds smoothly and without any mishaps.
Step-by-Step Instructions
Building the Picnic Table
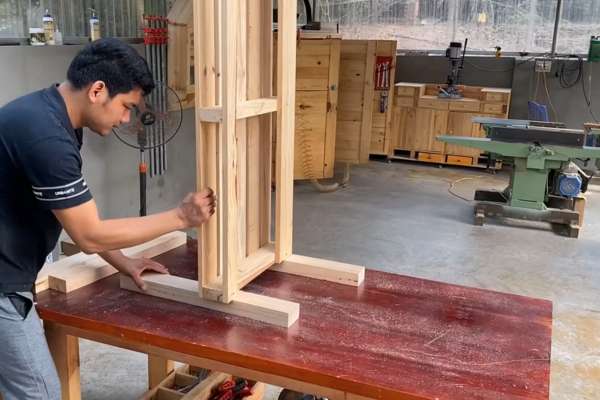
- Cut the Lumber to Size:
Begin by cutting the lumber to the specified dimensions according to your design plan. Precise measurements and straight cuts are essential for ensuring a well-fitted and stable picnic table.
- Assemble the Table Top:
With the lumber prepared, assemble the table’s top by aligning the boards, ensuring even spacing and consistent overhang. This step lays the foundation for a flat and even surface.
- Constructing the Table Frame:
Create the table frame by connecting the table’s long and short sides, forming a rectangular shape. Secure the frame with stainless steel fasteners to provide structural integrity.
- Attaching Table Top and Seats:
Attach the table’s top to the frame, aligning it evenly. Secure it firmly to ensure a stable working surface. Next, fix the separate bench seats to the frame, ensuring proper placement and symmetry.
- Attach the Legs to the Table Top:
Install the table legs at each corner, securing them to the tabletop and frame. Proper leg placement is crucial for stability, and stainless steel fasteners are essential for a strong connection.
- Add Bracing and Supports:
To reinforce the picnic table’s structure, incorporate bracing and supports underneath the tabletop and between the legs. This step enhances the overall strength and durability of the table, making it capable of withstanding outdoor conditions and frequent use.
Building the Benches

- Cutting Bench Seat and Backrest Boards:
Begin by accurately cutting the bench seat and backrest boards to the predetermined dimensions. Precision in these measurements is crucial for a comfortable seating arrangement.
- Assembling Bench Seats:
Assemble the bench seats by aligning the seat boards evenly. Create a smooth, comfortable surface by maintaining proper spacing between the boards and ensuring consistent overhang.
- Constructing Bench Frames:
To create the bench frames, connect the bench’s long and short sides to form rectangular shapes. This framework provides structural integrity and ensures the stability of the benches.
- Attaching Seats and Backrests:
Secure the bench seats to the frames, ensuring they are level and securely fastened. For backrests, attach the boards at the desired angle and height for ergonomic support.
- Attach the Legs to the Benches:
Mount the bench legs at each corner, securely fastening them to the seats and frames. Proper leg placement is essential to provide a stable and robust seating foundation.
- Reinforcing the Benches:
To fortify the benches further, consider adding bracing and supports beneath the seating area and between the legs. These reinforcements enhance the overall strength and durability of the benches, ensuring they can withstand outdoor elements and daily use.
Sanding and Finishing
Sanding and finishing are crucial final steps to enhance the visual appeal and durability of your table and benches:
Smoothing Surfaces:
Begin by thoroughly sanding all wooden surfaces, including the tabletop, benches, and any exposed edges. Sanding ensures a smooth, splinter-free finish and helps to eliminate rough spots or imperfections in the wood, preparing it for a pristine appearance.
Applying Protective Finish:
Once the surfaces are smooth, apply a protective finish that is specifically designed for outdoor use. This finish helps shield the wood from the elements, such as UV rays, moisture, and temperature fluctuations, extending the lifespan of your picnic furniture. Make sure to follow the manufacturer’s instructions for proper application and drying times.
Painting or Staining (Optional):
For a personalized touch, you can choose to paint or stain your table and benches. Select high-quality outdoor paint or stain that complements your outdoor space’s aesthetics. This step not only adds color but also offers an extra layer of protection against weathering. Apply even coats and allow sufficient drying time between each layer for a flawless finish.
Maintenance and Longevity
Maintaining your picnic table and benches is essential to ensure their longevity and continued appeal:
Tips for Caring for Your Picnic Table:
To keep your picnic furniture in optimal condition, regularly clean it by removing debris and dirt. Use a gentle soap solution and a soft brush for cleaning. Inspect the wood for any signs of wear or damage, and address issues promptly to prevent further deterioration. Additionally, consider placing a cover over your picnic table during harsh weather conditions to shield it from the elements.
Repair and Refinishing Guidelines:
If your table and benches show signs of wear or damage, follow repair and refinishing guidelines. Sand any rough areas, apply touch-up protective finish, and repaint or restrain as needed. Replace any damaged or rotted wood promptly to maintain structural integrity. Regular maintenance and timely repairs will prolong the lifespan of your outdoor furniture, ensuring that it remains a durable and inviting feature in your outdoor space.
Read more: How To Make Benches In Minecraft
Conclusion
After the careful planning, construction, and maintenance of your table and benches, you can now savor the fruits of your labor. These meticulously crafted pieces offer the perfect setting for outdoor gatherings, fostering connections and memories that will last a lifetime. The satisfaction of a job well done resonates not only in the quality and longevity of your outdoor furniture but in the moments of joy and togetherness it brings to your life. As you relish the comfort and beauty of your creation, remember that it’s more than just wood and screws; it’s a testament to your craftsmanship, dedication, and the simple pleasures of outdoor living.