A wooden bench, an emblem of timeless simplicity and practicality, transcends mere furniture. This guide delves into the world of wooden benches, Exploring their diverse types, myriad applications, And the profound advantages of crafting your very own. Within this concise yet comprehensive exploration, we aim to provide you with invaluable insights into the art of wooden bench making, enabling you to embark on a journey of craftsmanship and utility.
What’s the best type of wood for a wooden bench?
It’s important to consider factors like durability, appearance, And budget. Common choices include pine, cedar, redwood, and oak. Pine is budget-friendly and easy to work with, but may require additional finish for durability. Cedar and redwood offer natural resistance to decay and insects, making them ideal for outdoor benches. Oak is a durable hardwood with an attractive grain, often used for indoor benches. Ultimately, Your choice should align with your project’s requirements and personal preferences for aesthetics and maintenance.
What materials do I need to make a wooden bench?
To make a wooden bench, you’ll need several key materials, including wood planks, screws or nails, a saw, measuring tape, And a drill. These are the basic essentials for constructing a sturdy and functional bench. Additionally, You may choose to use sandpaper to smooth the wood surfaces and optional materials like paint or a cushion for added comfort and aesthetics. The choice of wood and specific materials can vary based on your design preferences and the intended location of the bench.
Tools and Materials

The most important material for making a wooden bench is wood. The type of wood you choose will depend on the intended use of the bench and your budget. For outdoor benches, pressure-treated wood is a good choice, As it is resistant to rot and decay. Other popular choices for outdoor benches include cedar and teak. For indoor benches, you can use a variety of hardwoods such as oak, maple, And cherry.
- Wood (pressure-treated wood is ideal for outdoor benches): Start by selecting high-quality wood, with a preference for pressure-treated varieties for outdoor benches, ensuring longevity and weather resistance.
- Saw: Acquire the appropriate saw, whether it’s a hand saw for precision or a power saw for efficient cutting, to shape your wooden components accurately.
- Drill: Utilize a drill with the correct bits to create holes and secure joints, streamlining the assembly process for your bench.
- Screwdriver: A screwdriver is essential for fastening components securely, ensuring the stability and structural integrity of your Seat.
- Measuring tape: Precision is key; use a measuring tape to accurately mark and cut your wood, ensuring uniformity and balance in your design.
- Level: Ensure your bench is stable and even by employing a level during construction, guaranteeing a professional and aesthetically pleasing end result.
- Safety glasses: Prioritize safety with protective eyewear, safeguarding your eyes from flying wood chips, dust, and debris during the woodworking process.
- Gloves: Protect your hands with sturdy gloves, offering both safety and comfort as you handle tools, wood, and finishes, ensuring a safe and enjoyable woodworking experience.
Instructions
Once you have gathered your tools and materials, it is time to start building your wooden bench. Here is a general overview of the steps involved:
- Choose a design: Begin your wooden Seatproject by selecting a design that resonates with your style and needs. Explore various options in woodworking resources, both online and in magazines. Once you’ve made your choice, either sketch the design or obtain a set of detailed plans.
- Cut the wood to size: With your chosen design or plans in hand, employ a saw to cut the wood to the precise dimensions indicated. Ensure accuracy by measuring diligently and always prioritize safety by wearing protective glasses.
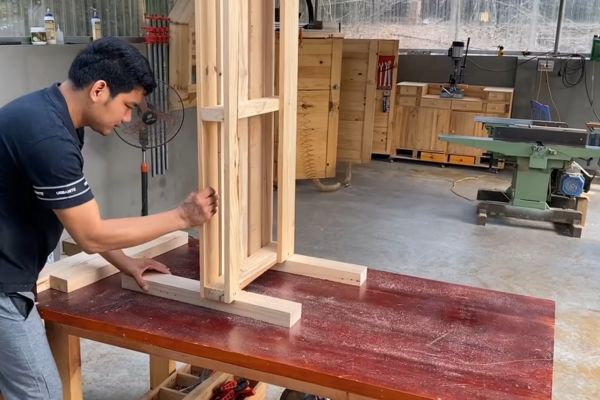
- Assemble the bench: Follow the assembly instructions provided by your chosen design. Use fasteners such as screws or nails that are long enough to secure the wood components together and into the frame, ensuring structural integrity.
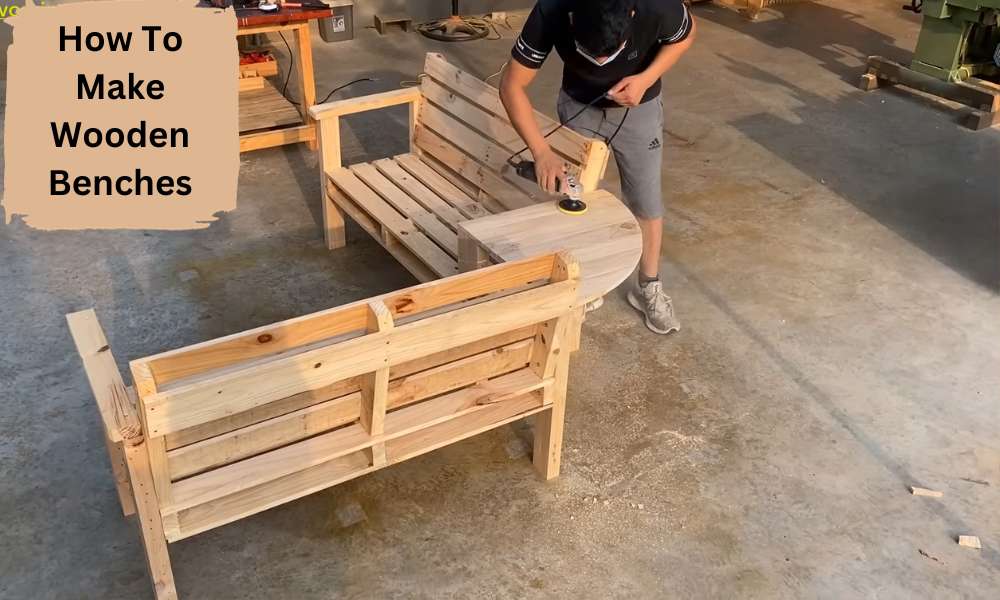
- Sand the bench: After assembly, take a moment to lightly sand the bench’s surfaces. This step helps remove any rough edges and imperfections, leaving the wood with a smooth and polished finish.
- Finish the bench: To protect your wooden Seat From the elements and achieve the desired aesthetic, consider applying a finish. You have the option of paint, stain, or polyurethane. Select the finish that aligns with your vision for the Seat, ensuring it not only looks great but also maintains its durability over time.
Upholstery and Cushioning (if applicable)

1. Selecting Suitable Upholstery Materials:
If your wooden bench design includes cushioning, the first step is to carefully select appropriate upholstery materials. Consider factors such as fabric type, color, and texture, keeping in mind your bench’s purpose and location. Choose materials that are both aesthetically pleasing and durable, capable of withstanding regular use and potential exposure to the elements.
2. Creating Comfortable
Cushioning: Craft comfortable cushioning that complements your bench’s design and function. Measure the bench’s seating area precisely to ensure a snug fit. Select appropriate foam or padding materials that provide the desired level of comfort. If applicable, consider incorporating layers to enhance support and comfort. Ensure that the cushioning aligns with the chosen upholstery, creating a cohesive and inviting seating surface.
3. Upholstering the Bench:
Upholstering your wooden bench requires precision and attention to detail. Begin by laying out your selected upholstery material, ensuring it is smooth and free of wrinkles. Carefully position the cushioning on top of the fabric, aligning it with the bench’s dimensions. Then, wrap the upholstery around the cushioning and wooden seat, securing it in place. Use staples or upholstery tacks for a clean and professional finish. Trim any excess fabric neatly. Make sure the upholstery is taut and free of creases for a polished final appearance. This step not only enhances the comfort of your bench but also adds a touch of elegance to the overall design, making it a perfect addition to your space.
Maintenance and Care
1. Tips for Preserving the Bench’s Longevity:
To ensure your wooden bench withstands the test of time, implement a few key practices. Regularly inspect the Seat for signs of wear, including cracks, splits, or loose fasteners. Keep the bench clean by removing debris and dirt that can promote rot or decay. If your Seat is located outdoors, consider applying a protective finish as needed to shield it from the elements. Avoid placing heavy objects that may strain the bench’s structure and periodically check for insect damage.
2. Seasonal Maintenance Routines:
Seasonal care is vital, especially for outdoor benches. With the changing seasons, your Seat may be exposed to varying weather conditions. In the spring and summer, inspect and clean the bench, addressing any damage promptly. In autumn, remove leaves and debris to prevent moisture retention. Before winter sets in, protect your Seat from snow and ice by storing it indoors or covering it with a weather-resistant tarp.
3. Repairing and Refinishing Your Bench:
When signs of wear or damage emerge, don’t hesitate to make necessary repairs. Replace any loose or damaged fasteners to maintain the bench’s stability. For minor surface imperfections, consider sanding and refinishing to restore its appearance. If the damage is more substantial, such as deep cracks or rotted wood, consider professional repairs or replacement parts. Regular refinishing can also be a preventative measure to keep your Seat looking fresh and well-protected.
Safety Considerations

1. Safe Handling of Tools and Equipment:
Prioritize safety by familiarizing yourself with the proper handling of tools and equipment. Always read and follow the manufacturer’s instructions for each tool. Maintain tools in good working condition, keeping blades sharp and guards in place. Use clamps or fixtures to secure workpieces when needed to prevent slipping. When not in use, store tools in designated areas to avoid accidents.
2. Protecting Against Common Woodworking Hazards:
Woodworking presents several potential hazards, including dust, flying debris, and sharp objects. Protect your eyes by wearing safety glasses or goggles to shield them from splinters, dust, and flying particles. Use hearing protection if working with noisy machinery. To shield your respiratory system from wood dust, employ a dust mask or a respirator as needed. Keep your workspace well-ventilated and free from clutter to reduce fire hazards.
3. Safety Guidelines for Woodworking:
Adhere to safety guidelines specific to woodworking to ensure your well-being throughout the project. Always maintain a clear and focused mind when operating tools, avoiding distractions that could lead to accidents. Wear appropriate clothing and safety gear, including gloves, to protect your hands from splinters and sharp edges. Familiarize yourself with the emergency shut-off procedures for your tools. Additionally, learn the basics of first aid in case of minor injuries.
Read more : Boys Bedroom Paint Ideas
Conclusion
Crafting a wooden Seat brings immense satisfaction and pride. It’s a tangible manifestation of creativity and skill. This journey not only builds a beautiful bench but also self-confidence. Sharing your work can ignite a passion for woodworking in others. Together, we can inspire and create. Key takeaways from this guide include patience, precision, and the joy of making. So, go forth, craft, and let your work be a beacon of inspiration for all.