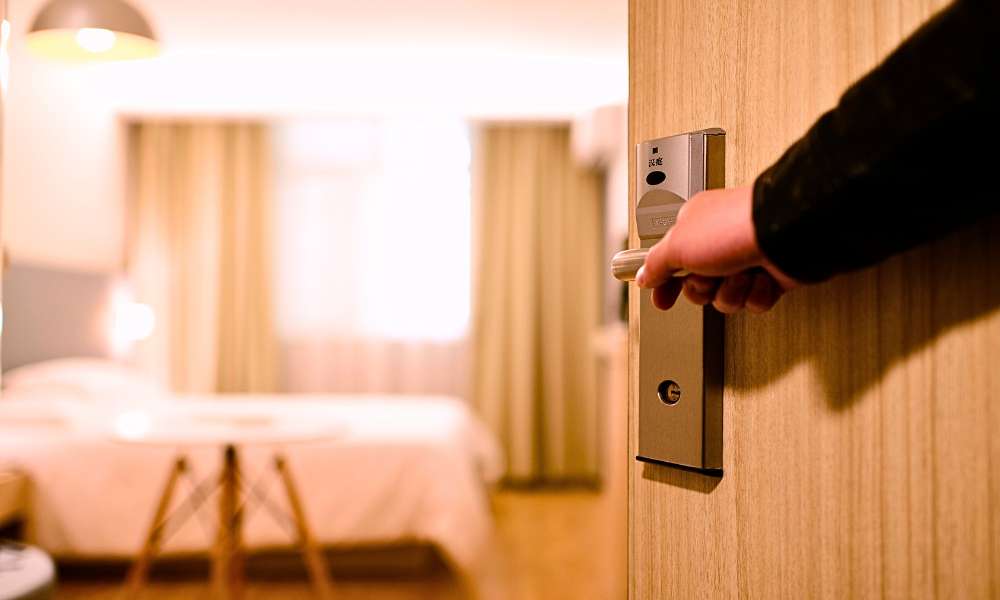
You can increase the security And privacy of your personal space by install a lock on your bedroom door. Learning how to install a lock on a bedroom entrance is essential for those who desire more privacy Or need greater security. With some basic hardware And tools, It may also be a simple process that you can finish. Before you start, Make sure you have the appropriate lock for your door because different locks may require different installation methods. Having a helper could be advantageous, Particularly when it comes to holding the entrance And fasten in place as you install them.
What Tools Are Needed To Install A Lock On A Bedroom Door?
A few simple tools are needed to install a lock on a bedroom gate. You’ll need screwdrivers, An adjustable wrench, And a drill with drill bits. Different tools may be needed depending on the type of fasten you wish to install.
However, The following is a list of potential general requirements:
- energy drill
- bit drills
- Screwdriver
- Screws
- Measurement tape
- Marker Or a pencil
- Level A handles Or doorknobs
Before you begin, Make sure you have everything you need by attentively reviewing the manufacturer’s instructions for the specific lockset you intend to install.
Here Are Some Steps For How To Install A Lock On A Bedroom Door
Step 01- Firstly Determine The Type Of Lock You Need

Deadbolts: These fasten, Which are frequently put on the inside of doors, Need to be locked And unlocked with a key.
Handle locks: These fasten are often used in conjunction with a knob Or lever handle And are typically locked And unlocked by turning the handle.
Privacy locks: For locking And unlocking the gate, privacy fasten often have a push Or turn button on the inner side of the door. They are frequently used on the bathroom And bedroom gates.
Combination locks: Combination locks are a fantastic choice for people who don’t want to carry keys because they employ a combination of numbers or characters to unlock the entrance.
Once you’ve identified the kind of fasten you require, you may select the right lockset And gather the hardware And supplies you’ll need for the installation procedure.
Step 02- Gather The Necessary Tools

- Power drill: To make the hole for the lockset, You’ll need a power drill.
- Drill bits: You will need drill bits that are appropriate for the fasten set you are installing.
- Screwdriver: You will need a screwdriver to attach the fasten set And strike plate to the entrance.
- Screws: You will need screws to attach the lockset And strike plate to the door And door frame.
- Tape measure: You will need a tape measure to measure And mark the spot for the fasten set.
- Pencil Or marker: You will need a pencil Or marker to mark the spot for the lockset.
- Level: You will need a level to ensure that the fasten is installed straight.
- A door knob Or handle: Depending on the type of lockset you are installing, You may need a gate knob Or handle to attach to the lockset.
- Hammer: You may need a hammer to tap the chisel for creating the latch And strike plate mortises.
- Chisel: You will need a chisel to create the latch And strike plate mortises.
- Safety goggles: To safeguard your eyes during installation, It is advised to use safety goggles.
- To ensure a quick And easy installation process, Make sure you have all the required tools before beginning.
In addition to these basic tools, You may also need wood chisels Or spade bits if your gate doesn’t already have holes for the lockset. A hammer may come in handy for tapping in chisels Or making small adjustments to the latch plate.
Step 03- Mark The Spot For The Lock And Latch Holes

If you’ve never done it before, The task could seem overwhelming. Fortunately, With a few tools And some basic knowledge, You can easily install a lock on your bedroom gate without any professional help.
To mark the spot for the lock And latch holes on a bedroom door, Follow these steps:
- Determine the height at which you want to install the lockset. You can change the height from the bottom of the door from the conventional 36 inches to whatever suits you best.
- Make a mark with a pencil Or marker on the edge of the gate at the height you have determined using a tape measure.
- Place the lockset faceplate against the entrance, lining it up with the mark you made in Step 2.
- Use a pencil Or marker to trace the outline of the faceplate on the entrance.
- Use a drill And the appropriate-sized drill bit to create a hole in the center of the faceplate outline. This hole will be for the lockset’s latch.
- Holding the latch up to the hole you just made in the entrance, trace the latch’s outline using a pencil Or marker.
- Use a drill And the appropriate-sized drill bit to create a hole for the latch in the center of the latch outline.
- Use a chisel to create a mortise for the latch, which is a rectangular hole that the latch will fit into. Chisel out the wood until the latch fits snugly into the mortise.
- Test the latch to ensure that it fits smoothly into the mortise And extends And retracts smoothly.
- Repeat steps 3-9 for the lock’s faceplate, marking its location, creating the necessary holes, And mortising the door for the fasten.
By following these steps, you can mark the spot for the fasten And latch holes And prepare the door for the lockset installation. Be sure to double-check your measurements And take appropriate safety precautions when using tools.
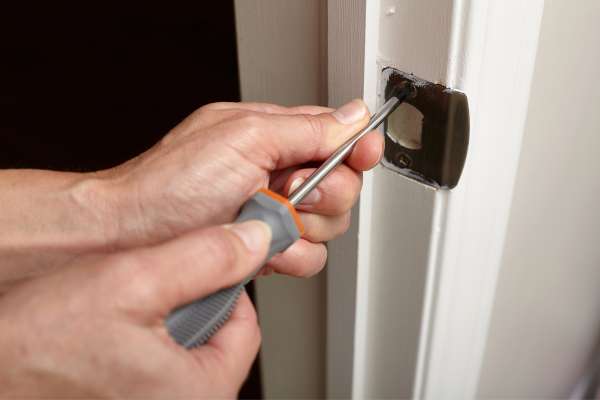
Step 04- Drill The Hole At The Marked Spot

One of the most crucial steps when installing a lock is drilling the hole at the marked spot. To drill the hole at the marked spot for installing a lock on a bedroom door, follow these steps:
- Secure the door in place with clamps Or by having someone hold it steady.
- Attach the appropriate-sized drill bit to your power drill. The size of the drill bit will depend on how big of a hole your particular lockset requires.
- Hold the drill perpendicular to the gate And position it at the center of the marked spot for the lockset.
- Apply steady pressure to the drill And start drilling slowly.
- Drill through the gate until you reach the other side.
- Use sandpaper to smooth off any rough edges Or unkempt areas in the hole.
- Test the lockset’s latch to make sure it fits smoothly into the hole.
By following these steps, you can drill a hole at the marked spot for your lockset’s latch. Be sure to take appropriate safety precautions when using power tools, such as wearing safety goggles And keeping the drill bit perpendicular to the door.
Step 05- Chisel The Latch Hole

To chisel the latch hole for installing a fasten on a bedroom door, Follow these steps:
- Use a chisel to create the latch mortise, Which is a rectangular hole that the latch will fit into.
- Place the latch against the edge of the door where you drilled the hole, With the faceplate against the surface of the gate.
- Trace around the latch faceplate onto the edge of the gate with a pencil Or marker.
- Carefully remove the wood inside the traced area using a chisel. Make sure your chisel is down directly, Not at an angle.
- Make sure the mortise is deep enough for the latch to lay flat with the surface of the gate by rounding the edges with the chisel.
- Test the latch by inserting it into the mortise to ensure that it fits snugly And moves smoothly.
- If necessary, Adjust the mortise with the chisel until the latch moves smoothly And fits correctly.
By following these steps, You can chisel the latch hole for your fasten on a bedroom gate. When using sharp instruments, Always take the proper safety precautions, Such as wearing gloves And keeping your fingers away from the chisel’s blade.
Step 06- Install The LocK

We’ll walk you through how to put a fasten on a bedroom door on this step. Installing a fasten on a bedroom door can help improve privacy And security in your home.
There are various types of locks you can install on a bedroom gate, Including deadbolts, knob locks, And electronic locks. Consider your needs And budget when choosing the fasten.
- Measure the door thickness. Most locks are designed for standard gate thicknesses, But some may require additional components for thicker doors.
- Determine the location for the lock. Take into account the lock’s height And intended function. If you’re installing a fasten. For instance, you should set it roughly 6 inches above the doorknob.
- Mark the location for the lock. Mark the location of the fasten installation on the entrance with a pencil. You may also need to mark the location on the gate jamb if you’re installing a deadbolt.
- Drill the holes for the lock. Use a drill to make the necessary holes for the fasten. Follow the manufacturer’s directions carefully for the particular fasten you are installing.
- Install the lock. Follow the manufacturer’s instructions for installing the fasten. This may include inserting screws And other components to secure the lock in place.
- Test the lock. Test the fasten after installation to make sure it is functioning properly. Make sure the fasten is engaging And disengaging smoothly, And that the key Or electronic code works as expected.
With these steps, You should now have successfully installed a fasten on your bedroom gate. Remember to always prioritize safety And security in your home.
Step 07- Install The Latch

We will guide you through the steps of installing the latch onto your bedroom gate. The steps are as follows:
- Select the latch type that you want to install. There are various types of latches you can install on a bedroom door, Including simple spring latches or latch sets that include a doorknob Or handle.
- Measure the door thickness. Most latches are designed for standard gate thicknesses, But some may require additional components for thicker doors.
- Determine the location for the latch. Consider the height of the latch And how it will be used. For example, If you’re installing a latch set with a doorknob, The doorknob should be placed about 36 inches above the floor.
- Mark the location for the latch. Mark the location of the latch’s installation on the gate with a pencil. Make sure to measure And mark accurately to ensure proper alignment.
- Drill the holes for the latch. Use a drill to make the necessary holes for the latch. Don’t forget to attach the latch according to the manufacturer’s directions.
- Install the latch. Follow the manufacturer’s instructions for installing the latch. This may include inserting screws And other components to secure the latch in place.
- Test the latch. Once the latch is installed, Test it to ensure it’s working properly. Make that the gate can be opened And closed simply And that the latch engages And disengages smoothly.
With these steps, You should now have successfully installed a latch on your bedroom gate. Even though it might not offer the same amount of protection as a fasten, A latch can nevertheless aid increase privacy And keep trespassers out.
Step 08- Test The Lock And Latch
If you are unfamiliar with the procedure, Installing a fasten can be challenging. Here are the steps to follow to test the lock And latch:
- Close the door. Make sure the door is securely closed before testing the lock And latch.
- Test the latch. Turn the doorknob A Or handle to ensure the latch is engaging properly. A smooth motion should be required to open And close the gate.
- Test the lock. If you installed a fasten, Insert the key And turn it to ensure the lock is engaging And disengaging smoothly. If you installed an electronic fasten, Test the code to make sure it unlocks the door.
- Test the strike plate. The strike plate is the metal piece that the latch Or fasten engages with when the gate is closed. Make sure the latch Or lock is properly aligned with the strike plate And that the gate is closing securely.
- Repeat the test. Test the lock And latch multiple times to ensure they are consistently working properly.
If you run into any problems when testing, Consult the manufacturer’s instructions Or call a seasoned locksmith for help. To maintain your safety And security, It’s crucial to check sure your bedroom gate’s fasten And latch are in good working order.
Step 09- Install Strike PlateI
Installing a strike plate on a bedroom gate is an important part of installing a lock. The strike plate is the metal plate that the lock Or latch engages with when the door is closed. Here are the steps to follow:
- Choose the strike plate. Make sure you choose a strike plate that is compatible with the lock Or latch you are installing. The strike plate should have holes that match the holes in the fasten Or latch.
- Measure And mark the location of the strike plate. Use a pencil to mark the spot where the strike plate will install on the gate jamb. Make sure the location is aligned with the fasten Or latch on the door.
- Drill pilot holes. Use a drill to make pilot holes for the screws that will secure the strike plate in place. Make sure the pilot holes are slightly smaller than the screws.
- Attach the strike plate. Line up the holes in the strike plate with the pilot holes And screw it in place using the screws provided.
- Test the lock. Close the door And test the fasten to make sure it is engaging with the strike plate properly. Adjust the strike plate if necessary by loosening the screws And shifting it slightly.
- Tighten the screws. Once the strike plate is properly aligned, Tighten the screws securely.
By following these steps, You should now have successfully installed a strike plate on your bedroom door. The strike plate is an important component of a secure fasten installation, So make sure it is installed correctly And functioning properly.
Step 10- Test The Strike Plate
Here are the steps to follow to test the strike plate:
- Close the door. Make sure the door is closed securely before testing the strike plate.
- Engage the lock. If you installed a lock, engage it by turning the key Or entering the code.
- Test the strike plate. While holding the fasten in place, Try to push Or pull the door open. If the strike plate is properly installed And aligned, the lock should hold the door in place And prevent it from opening.
- Adjust the strike plate if necessary. If the door is not securely locked Or the strike plate is not properly aligned, Loosen the screws holding the strike plate in place And adjust its position. Test the fasten again to make sure the strike plate is properly aligned And the lock is working properly.
- Repeat the test. Test the strike plate multiple times to ensure it is consistently holding the door securely in place.
If you run into any problems when testing, consult the manufacturer’s instructions Or call a seasoned locksmith for help. It’s important to make sure your bedroom gate fasten And strike plate are functioning properly to ensure your safety And security.
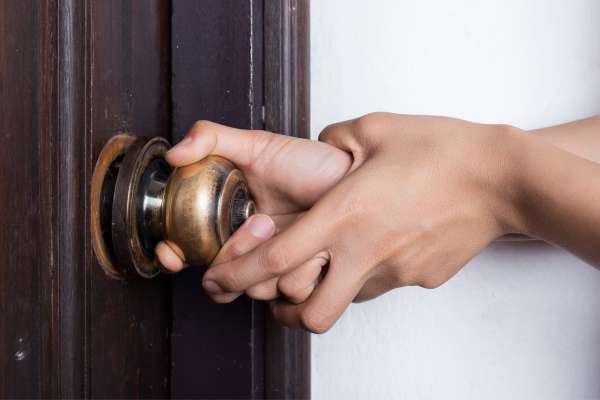
Step 11- Install The Door Handle

A bedroom door fasten installation requires the installation of a door handle. The steps are as follows:
- Pick a door handle. Make that the door handle you choose is compatible with the lock you are installing. The latch on the door handle ought to line up with the openings in the door.
- The old door handle was removed. If there are any screws within the door, remove them to remove any old door handles. To release the latch, Pull the handle.
- Activate the latch. Incorporate the replacement latch into the door’s edge hole. Use the provided screws to secure it in place after making sure it is properly positioned.
- Put the door doorknob in place. Line up the door handles with the latch on the edge of the door after you’ve inserted it through the door’s hole. Ensure that the handle is correctly positioned, then use the included screws to fix it.
- Examine the door handle. Use the door handle to test its operation. The latch should properly engage and disengage, and the handle should spin easily.
- Put the strike plate in place. Refer to the previous installation instructions if you haven’t already installed the strike plate.
You should now be able to install a door handle on your bedroom gate after following these instructions. Make sure the door handle is installed and operating properly because it’s crucial to a secure fasten installation.
Step 12- Install The Strike Box

The following procedures must follow in order to install a strike box for a fasten on a bedroom gate:
- Select the strikeout area. Make sure the strike box you select is appropriate for the fasten or latches you intend to install. The holes in the latch on the door handle or lock should line up with the holes in the striking box.
- The strike box’s location should measure and mark. Mark the location of the striking box’s installation on the door jamb with a pencil. A door handle or lock latch should be in line with the location
- Make test holes. To prepare the pilot holes for the screws holding the strike box in place, use a drill. Make sure the screws are slightly bigger than the pilot holes.
- Put the striking box in place. Use the provided screws to secure it in place after aligning the strike box’s holes with the pilot holes.
- Check the lock or door handle. In order to confirm that the latch is properly engaging with the strike box, close the door and test the door handle or fasten. If required, adjust the strike box by releasing the screws and moving them gently.
- Fix the screws firmly. Once the strike box position correctly, firmly tighten the screws.
You should now have a lock fitted on your bedroom gate’s strike box after following these instructions. Make sure the striking box appropriately mount and operating because it is a crucial part of a secure lock installation.
Step 13- Test The Strike Box
The steps to test the strike box are as follows:
- Knock on the door. Before putting the strike box to the test, make sure the door shut tightly.
- Open the lock. If you installed a lock, turn the key Or input the code to open it.
- Examine the strike zone. Try to open the door by pushing Or pulling it while keeping control of the lock. The lock should keep the door close And keep it from opening if the strike box place And aligned correctly.
- If needed, adjust the striking box. Remove the screws holding the strike box in place And make the necessary modifications if the door not securely locked Or positioned. To confirm that the strike box correctly position And that the lock operates as intended, test the lock once again.
- Test it once more. To make sure the door regularly held securely in place, test the striking box many times.
If you run into any problems when testing, consult the manufacturer’s instructions Or call a seasoned locksmith for help. To maintain your safety And security, it’s crucial to check sure your bedroom gate lock And strike box are in good working order.
Step 14- Install The Keys And Lockset Cover

Here are the steps to follow:
- Install the keys. Insert the keys into the lock and test them to make sure they turn smoothly and the lock engages and disengages properly.
- Install the lockset cover. The lockset cover is a decorative cover that goes over the lock and latches on the door handle. Simply slide the cover over the lock and latch and align it properly. Use the screws provided to attach the cover to the door handle.
- Test the lock and lockset cover. Test the lock and lockset cover to make sure they are functioning properly. The lock should engage and disengage smoothly and the lockset cover should securely attach to the door handle.
By following these steps, you should now have successfully installed a lock and lockset cover on your bedroom door. Make sure to keep the keys in a secure location and test the lock period to ensure it is functioning properly. A properly installed lock on your bedroom gate can provide an added level of security and peace of mind.
Step 15- Clean Up Any Debris From The Installation Process

Cleaning up any debris from the installation process is an important final step when installing a lock on a bedroom door.
The steps are as follows:
- Amass your equipment. Collect all tools and materials that use during the installation process, Such as screws, Screwdrivers, Drills, And packaging materials.
- Dispose of packaging materials. Remove any packaging materials and dispose of them properly.
- Clean up any sawdust Or debris. Remove any sawdust, Wood shavings, Or other debris from the floor Or vicinity using a broom, Dustpan, Or vacuum cleaner.
- Check for any leftover screws Or tools. Make sure you have gathered all the screws, Screwdrivers, Drills, And other installation-related gear.
- Inspect the lock And latch. Check the lock And latch to make sure they are functioning properly And securely attached to the door.
After the lock installation procedure finish, you can make sure that your bedroom gate is clean And clear of debris by following these instructions. This will not only make your bedroom look neater And more organized, but it will also help prevent any accidental injuries from stepping on stray screws Or debris.
How Do You Choose The Right Lock For A Bedroom Door?
The degree of security you need, The type of door you have, And your personal preferences are all things to consider when choosing the right lock for a bedroom gate. To remember, Have the following in mind:
Think about the type of protection you require: Are you looking for a lock that only offers seclusion, Or do you need a more secure lock to protect your belongings Or deter trespassers? For the majority of bedroom doors, A simple privacy lock is generally sufficient, But for increased security, You might want to consider a deadbolt Or a smart lock.
Analyze the door type you have: Different locks need for various types of doors. For instance, A hollow-core door could only be able to support a simple privacy lock while a solid wood door can support a deadbolt. Make sure the lock you select is appropriate for the style of door you have.
Decide which locking mechanism you prefer: Keyed locks, Combination locks, And smart locks are just a few of the various locking mechanisms available. The most popular And secure lock key, Whereas combination locks are the best option for people who don’t want to carry keys. Smart locks are getting more And more popular as a result of the ability to remotely lock And open your door using a smartphone.
While security should be your top concern, You should also think about how the lock on your door looks. Pick a lock that goes well with the look And feel of your bedroom gate.
Consult a specialist: If you confuse about the appropriate lock for your purposes, It’s a good idea to consult with a professional locksmith who can provide installation And lock recommendations.
Is It Necessary To Drill A Hole In The Door To Install A Lock?
Yes, You must drill a hole in the door if you plan to install a deadbolt. A door hole must drill to accommodate the lock cylinder on a deadbolt. You might not need to drill a hole in the door if you’re installing a surface-mounted lock Or a smart lock that doesn’t need a standard key. Smart locks frequently fit utilizing the existing hole for the doorknob, Whereas surface-mounted locks connect to the surface of the door. In any case, It is essential to carefully follow the manufacturer’s instructions to ensure. A lock installed properly And securely. If you’re unsure of how to install the lock yourself, A professional locksmith can do it for you, Thus it is advisable that you seek their assistance.
What Should You Do If You Encounter Any Issues During The Installation Process?
It is important to halt installation And evaluate the situation if you run into any problems. You can follow the instructions listed below:
- Observe the installation guidelines: Ensure you are properly following the directions And have all the required tools And equipment. Make sure the lock you are installing is suitable for your door And the existing hardware by checking its compatibility a second time.
- Try to resolve the issue by looking for any obstructions Or alignment issues in the lock mechanism if you’re having problems.
- Seek expert assistance: It is preferable to do so if you are still having problems Or if you are unsure about continuing with the installation. A locksmith can assist you in correctly installing the lock And ensuring that it operates as intended.
- Remember that a lock installed incorrectly might jeopardize your security and safety. Thus it’s imperative to make sure the lock installed. If you run into any problems while installing, Don’t be afraid to ask for help from an expert.
Final Thought
Adding a lock to your bedroom door is a terrific method to increase your home’s security And privacy. To choose the type of lock that is best for you And your space, It is vital to conduct some preliminary study. Make sure to examine the door’s dimensions, Strength, And materials utilized to build it. Make sure you thoroughly read all installation instructions after choosing the appropriate hardware.