Having a desk in the bedroom is more than just a piece of furniture; it’s a cornerstone of productivity and organization. In today’s fast-paced world, where remote work and study are increasingly common, a dedicated workspace in the bedroom can make a significant difference in one’s daily routine. Whether it’s for completing tasks, studying, or pursuing creative endeavors, a well-designed desk provides a comfortable and conducive environment for focused work. In this guide, we’ll explore the importance of having a How To Build Desk For Bedroom and provide valuable insights into assessing space, choosing the right design, and maximizing functionality.
Assessing Space and Requirements
Before embarking on the journey of building a desk for the bedroom, it’s essential to assess the available space and determine specific requirements. Start by measuring the area where it will be placed, considering factors such as the dimensions of the room and any existing furniture. Identify your needs and preferences regarding size, storage options, and ergonomic features. Understanding these requirements will guide the decision-making process and ensure that the final design meets your expectations.
Choosing the Right Desk Design
Selecting a desk design for the bedroom, prioritize space-saving options that optimize functionality without sacrificing style. Consider compact designs that utilize vertical space, such as wall-mounted or corner desks, to maximize floor space in smaller bedrooms. Additionally, focus on functional features such as built-in storage, cable management solutions, and ergonomic design elements that enhance comfort and productivity. By carefully evaluating different designs, you can choose one that seamlessly integrates into your bedroom while meeting your specific needs.
Materials and Tools Needed
Embarking on the journey of building a desk for your bedroom, it’s essential to gather all the necessary materials and tools to ensure a smooth and successful construction process. From choosing the right materials to having the essential tools on hand, here’s a breakdown of what you’ll need:
Wood vs. Metal vs. Other Materials:
The choice of materials for your DIY desk will largely depend on your personal preferences, budget, and desired aesthetic. Wood, metal, and other materials each offer unique advantages and considerations:
Wood:
- Wood is a popular choice for DIY projects due to its versatility, durability, and natural beauty.
- Options range from affordable plywood to high-end hardwoods like oak, maple, or cherry.
- Wood desks can be customized with various finishes, stains, or paints to match your bedroom decor.
Metal:
- Metal desks are known for their sleek and modern appearance, making them ideal for contemporary bedroom designs.
- Materials such as steel or aluminum offer durability and stability, making metal desks suitable for heavy-duty use.
- Metal desks often come in pre-fabricated kits or modular designs, simplifying the construction process.
Other Materials:
- Depending on your creativity and design vision, you may consider alternative materials such as glass, acrylic, or composite materials like MDF (medium-density fiberboard).
- These materials can add a unique aesthetic touch to your desk while offering practical benefits such as easy maintenance or lightweight construction.
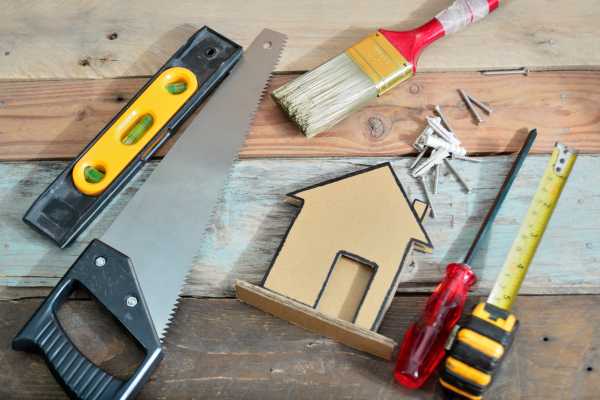
Essential Tools for DIY Desk Building:
To bring your desk-building project to life, you’ll need a variety of tools to measure, cut, assemble, and finish the materials. Here are some essential tools to have on hand:
- Measuring Tape: Accurate measurements are crucial for ensuring that your desk fits perfectly in your bedroom space.
- Saw: Depending on the materials you choose, you may need a circular saw, jigsaw, or handsaw for cutting wood, metal, or other materials.
- Drill: A power drill with drill bits and screwdriver attachments will be indispensable for drilling pilot holes and driving screws during assembly.
- Sander: To achieve smooth and polished surfaces, a sander or sandpaper is essential for sanding down rough edges and surfaces.
- Clamps: Clamps are handy for holding pieces together securely while glue dries or when assembling components.
- Level: A level will help ensure that your desk is straight and properly aligned during assembly.
- Safety Gear: Don’t forget to prioritize safety by wearing goggles, gloves, and a dust mask when working with tools and materials.
Step-by-step guide to building a desk

Preparing the Workspace
- Clear the Area: Start by clearing a spacious area in your bedroom or workspace where you’ll be building the desk. Remove any obstacles or clutter to ensure a safe and accessible workspace.
- Gather Tools and Materials: Gather all the necessary tools and materials for the project, including wood or metal for the desk frame, screws, a drill, saw, measuring tape, sandpaper, and safety equipment such as goggles and gloves.
- Protective Measures: Lay down a drop cloth or old sheets to protect the floor from dust and scratches during the construction process. Additionally, consider setting up a makeshift workbench or sturdy table to support the desk components as you work.
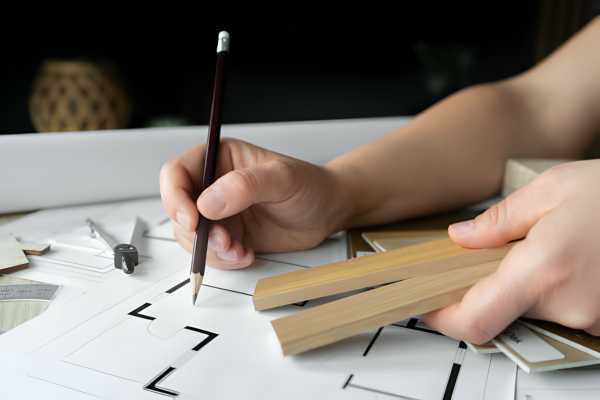
Measuring and Cutting Materials
- Measurements: Use a measuring tape to determine the dimensions of the desk, including length, width, and height. Consider factors such as the available space in your bedroom and your ergonomic needs when determining the size of the desk.
- Marking the Materials: Once you have the measurements, use a pencil to mark the wood or metal materials according to the dimensions of it. Double-check your measurements to ensure accuracy before making any cuts.
- Cutting the Materials: Carefully use a saw to cut the materials along the marked lines, making smooth and precise cuts. Take your time and use proper safety precautions to prevent accidents or injuries during the cutting process.
Assembling the Desk Components
- Preparation: Lay out all the cut materials in the designated workspace, ensuring that you have all the necessary components for assembly. Organize the pieces according to their respective sections of the desk, such as the frame, tabletop, and legs.
- Assembly Sequence: Follow the assembly instructions provided with design, if available, or use your own layout plan to guide the assembly process. Start by attaching the frame pieces together using screws and a drill, ensuring that all connections are secure and stable.
- Attaching the Tabletop: Once the frame is assembled, carefully place the tabletop on the frame and align it evenly. Use screws to secure the tabletop to the frame, ensuring that it is level and flush with the edges of the frame.
- Adding Finishing Touches: After the desk components are securely assembled, use sandpaper to smooth out any rough edges or surfaces. Apply a coat of paint or stain to enhance the appearance and durability of the desk, if desired.
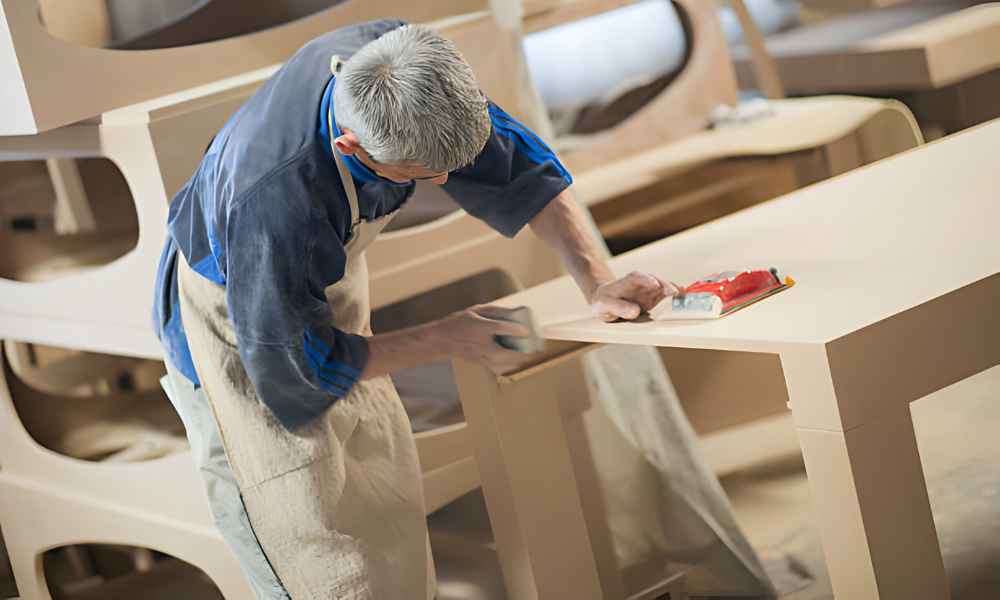
Finishing Touches and Customization
After the construction of the desk is complete, it’s time to add the finishing touches and customize it to your liking. One crucial step in this process is sanding the surfaces to smooth out any rough edges or imperfections. Using sandpaper or a power sander, carefully sand the entire desk, paying close attention to corners and edges. This step not only improves the aesthetic appeal but also ensures a comfortable and safe workspace. Once the sanding is complete, consider applying a coat of stain or paint to enhance the appearance and protect the surface from damage. Choose a finish that complements your bedroom decor and provides long-lasting durability.
Adding storage options to your desk can significantly enhance its functionality and organization. Depending on your needs and preferences, you can incorporate various storage solutions such as shelves, drawers, or compartments. Consider installing a keyboard tray or a built-in filing cabinet to keep essential items within reach while maximizing space. Additionally, you can use decorative baskets or bins to corral smaller items and reduce clutter on the desktop. By customizing it with tailored storage options, you can create a tidy and efficient workspace that meets your specific requirements.
Tips for Maintaining the Desk
To ensure that your newly built desk remains in optimal condition for years to come, it’s essential to follow a few simple maintenance tips. Regular cleaning and upkeep are key to preserving the desk’s appearance and functionality. Use a damp cloth or mild cleaning solution to wipe down the surfaces regularly, removing dust, spills, and debris. Pay special attention to areas prone to buildup, such as keyboard trays and drawer interiors. Additionally, consider using mats or coasters to protect the surface from scratches and water damage caused by drinks or hot objects.
Preventive measures can help extend the lifespan of your desk and minimize the need for repairs or replacements. Implementing simple strategies such as using felt pads on the bottom of furniture legs to prevent scratches on the floor, or placing mat under the keyboard and mouse to protect the surface from scratches and spills. Furthermore, avoid placing heavy or sharp objects directly on the surface to prevent denting or scratching. By taking proactive steps to protect your desk from wear and tear, you can enjoy a beautiful and functional workspace for years to come.
How do I choose the right design for a desk for my bedroom?
Choosing a design for a desk for your bedroom, consider factors such as the available space, your storage needs, and your personal style preferences. Browse online sources or home improvement stores for inspiration, and choose a design that fits your requirements and complements the existing decor of your bedroom.
Conclusion
Building a desk for your bedroom is a rewarding DIY project that allows you to create a customized workspace tailored to your needs and style preferences. By following the step-by-step guide outlined in this article and incorporating finishing touches, customization options, and maintenance tips, you can create a desk that enhances productivity, organization, and comfort in your bedroom. Whether you’re studying, working, or pursuing creative endeavors, investing time and effort into building a desk will pay off in the form of a functional and aesthetically pleasing workspace that reflects your personality and enhances your daily routine.