
A nightstand is not just A practical piece of furniture next to your bed; it can also be An opportunity to express your creativity And enhance the overall aesthetic of your bedroom. A DIY nightstand makeover is A fantastic way to breathe new life into an old Or outdated piece, Transforming it into A stylish And personalized accent that complements your decor. From simple paint jobs to intricate decoupage designs, The possibilities are endless when it comes to revamping this small but significant piece of furniture. In this article, We will explore a range of inspiring DIY nightstand makeover ideas that cater to different styles And skill levels. Whether you prefer a vintage, Rustic, modern, Or eclectic look, You’ll find plenty of creative concepts to spark your imagination. We will delve into various techniques, Materials, And finishes that can be used to transform an ordinary nightstand into a one-of-a-kind masterpiece.
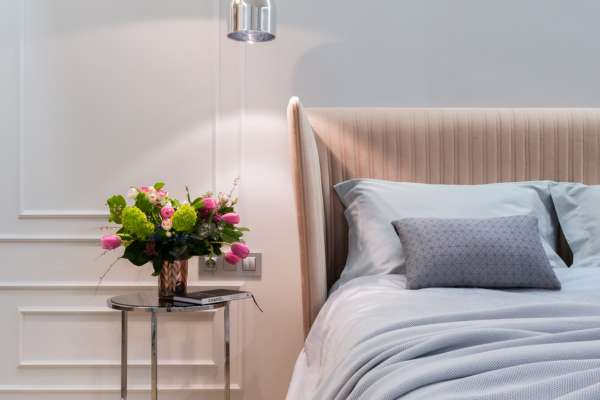
Choosing the Right Nightstand:

Selecting the right nightstand requires thoughtful consideration of various factors such as size, style, storage needs, And overall aesthetic appeal. This guide will help you make an informed decision And find the perfect nightstand for your bedroom.
Size And Proportions: Begin by assessing the available space next to your bed. Consider the height, width, And depth of the area to determine the appropriate size for your nightstand. It’s important to choose a nightstand that is proportionate to the bed And other furniture in the room.
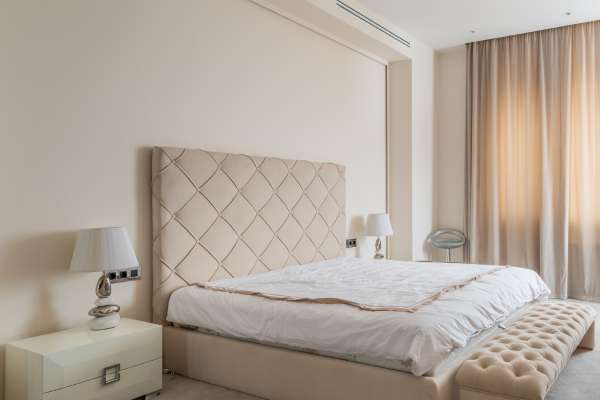
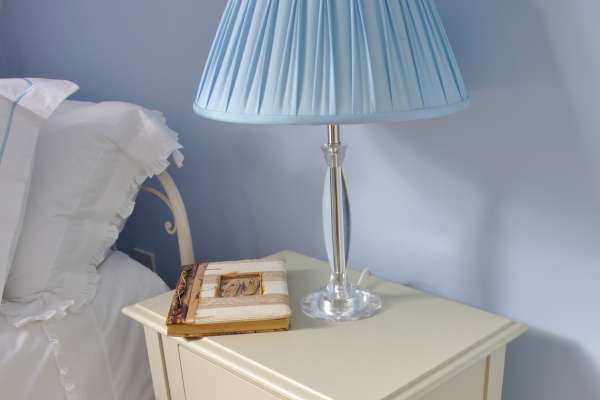
Style And Design: The nightstand should harmonize with the overall style And theme of your bedroom. Whether your room has a modern, traditional, rustic, Or eclectic vibe, there are nightstands available in a variety of designs to suit your taste.
Functionality And Storage: Think about how you plan to use your nightstand. If you like to keep essential items within reach, opt for a nightstand with drawers Or shelves for storage.
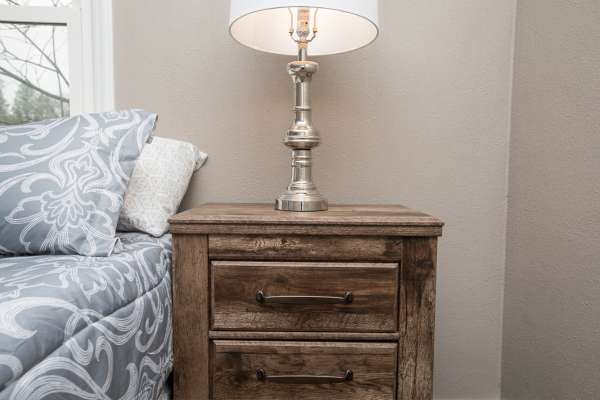
Quality And Durability: Investing in a well-made nightstand is crucial for longevity And functionality. Look for solid construction, sturdy materials, And quality hardware to ensure your nightstand withstands everyday use.
Budget Considerations: Set a budget for your nightstand purchase And stick to it. Nightstands come in a wide price range, And while it’s important to invest in quality, there are options available for every budget.
Preparing the Nightstand for Makeover:

Preparing the nightstand involves a few key steps that will help you achieve the best results And create a smooth canvas for your creative ideas. Here’s a guide to preparing your nightstand for a makeover:
Clear the Nightstand: Start by removing any items, Decorations, Or clutter from the nightstand. Take out all drawers And empty the contents. This will provide you with a clear workspace And allow you to thoroughly assess the condition of the nightstand.
Clean the Surface: Give the nightstand a thorough cleaning to remove dust, Dirt, And any residues. Wipe down the surface with a mild cleaner Or a mixture of warm water And gentle soap. Use a soft cloth Or sponge to gently scrub away any grime Or stains.
Repair And Sand: Inspect the nightstand for any damages, Scratches, Or dents. If you come across any issues, now is the time to address them. Repair any loose joints, Fill in cracks Or holes, And sand down rough areas.
Prime (if necessary): Depending on the condition of the nightstand And the type of makeover you have in mind, You may need to apply a primer. Primer helps to create a uniform surface, Improves paint adhesion, And prevents stains Or bleed-through from the original finish.
Protect And Mask: If there are any parts of the nightstand that you don’t want to be painted Or altered, Protect them by using painter’s tape Or plastic sheets. Cover the surrounding area with drop cloths Or newspaper to catch any drips Or spills.
Final Cleaning: Before applying any paint Or finishes, Give the nightstand one last wipe down to ensure it is free from any dust Or debris that may have accumulated during the preparation process. Use a tack cloth Or a slightly damp cloth to gently clean the surface.
Painting Techniques:
Here are three popular painting techniques you can consider:
1. Solid Color

The solid color technique is a classic choice that offers a clean And timeless look. It involves applying a single color to the entire surface of the nightstand, Creating a cohesive And uniform appearance. Before painting, Ensure that your nightstand is properly prepared And primed, If necessary. Choose a high-quality paint suitable for the material of your nightstand, Such as wood, Metal, Or laminate. Apply the paint using a brush, Roller, Or sprayer, Following the manufacturer’s instructions. Start with thin coats And allow each coat to dry completely before applying the next. Multiple coats may be needed to achieve a smooth And even finish. Remember to paint the sides, Edges, And any hidden areas for a professional result. Consider complementary Or contrasting colors that coordinate with your bedroom decor.
2. Ombre Effect

The ombre effect is a stylish And trendy painting technique that creates a gradient Or fades from one color to another. This technique adds depth And visual interest to your nightstand. To achieve the ombre effect, Select two Or more paint colors that blend well together. Start by painting the entire nightstand with the lightest color as the base coat. Once dry, Divide the nightstand into sections, From top to bottom Or from side to side, Depending on your preference. Mix the base color with a small amount of the second color to create a middle shade. Apply this blended color to the middle section of the nightstand, Blending it gently with the base color. Repeat the process with the second color, Adding a little more to the mix to create a darker shade.
3. Stenciling
Stenciling is a fantastic technique to add intricate patterns, Designs, Or motifs to your nightstand. It allows you to create a customized And unique look that reflects your personal style. Start by selecting a stencil Or creating your own design. Stencils can be found in craft stores Or online, Or you can make your own by cutting shapes Or patterns out of stencil paper Or cardboard. Position the stencil on the nightstand surface And secure it in place using painter’s tape. Dip a stencil brush Or a sponge into your chosen paint color And lightly dab it onto the stencil openings. Be careful not to use too much paint to avoid smudging. Gently remove the stencil, Reposition it if needed, And continue the process until your desired pattern is complete.
Decoupage:
Here’s a step-by-step guide on how to achieve a decoupage effect on your nightstand:
Gather Materials:
- Nightstand
- Decorative Paper or Fabric
- Decoupage Medium
- Paintbrush or Foam Brush
- Scissors
- Optional
- Prepare the Surface
Cut And Arrange the Paper or Fabric: Cut out the paper or fabric pieces you wish to use for your decoupage design. Experiment with different sizes And shapes to create a visually appealing arrangement. Lay out the pieces on the nightstand’s surface without adhering them to finalize the design.
Apply the Decoupage Medium: Starting with one section at a time, apply a thin layer of decoupage medium to the surface of the nightstand using a brush. Place the paper or fabric piece onto the wet decoupage medium And smooth it down gently, removing any air bubbles or wrinkles.
Build Layers And Seal: Continue layering the paper or fabric pieces, overlapping And blending them as desired. As you work, apply additional coats of decoupage medium over each layer, allowing it to dry between coats. This will create a smooth And durable finish.
Finishing Touches: Once your decoupage design is complete And dry, you can add final touches if desired. Apply a final layer of decoupage medium over the entire nightstand to seal And protect the surface. For added durability, consider applying a clear sealant or varnish.
Upcycling with Wallpaper:

Upcycling your nightstand with wallpaper is a fantastic way to give it a fresh And stylish look. With a wide range of designs available, You can easily customize your nightstand to suit your personal style And complement your bedroom decor. Before starting, Ensure that your nightstand is clean And properly prepared.
Measure And cut the wallpaper to fit each surface, Adding a few inches to each measurement to ensure ample material. Apply the wallpaper using a suitable adhesive, Either by peeling off the backing Or applying adhesive to the back of the wallpaper Or the nightstand surface. Smooth out any air bubbles with a squeegee Or smoothing tool. Trim any excess wallpaper And allow it to fully adhere And dry. Check for any loose edges Or bubbles And secure them if necessary.
Consider applying a sealant Or varnish to protect the wallpaper from everyday wear. This upcycling project allows you to add color, Pattern, And texture to your nightstand, Transforming it into a stunning And unique piece that adds personality And flair to your bedroom.
Adding New Hardware:
Here’s a step-by-step guide on how to add new hardware to your nightstand:
Choose Your New Hardware: Select handles, knobs, Or pulls that complement the overall design And aesthetic of your nightstand. Consider the material, finish, And style of the hardware to ensure it harmonizes with the existing Or planned decor of your bedroom.
Measure And Mark: Measure the distance between the existing screw holes on your nightstand to ensure that the new hardware will fit properly. Use a pencil Or masking tape to mark the desired location for the new hardware.
Remove the Old Hardware: If your nightstand already has hardware, Remove it by unscrewing the screws Or bolts that hold them in place. Keep the hardware And screws aside for future use Or discard them if they are no longer needed.
Make Any Necessary Adjustments: Sometimes the new hardware may have different hole alignments Or sizes compared to the existing ones. If this is the case, You may need to make adjustments. You can fill the existing holes with wood filler And sand it down, Or use a drill to create new holes in the desired locations.
Attach the New Hardware: Position the new hardware over the marked spots on the nightstand. Insert the screws Or bolts through the backside of the nightstand And align them with the holes in the hardware.
Check And Adjust: After attaching the new hardware, Double-check that it is securely in place And properly aligned. Gently tug on the handles Or knobs to ensure they are firmly attached And won’t come loose easily.
Creating a Rustic Look:

If you prefer a rustic or distressed look for your nightstand, consider using techniques like distressing, antiquing, or whitewashing. Sand the edges and corners of the nightstand to create a worn appearance. Apply a dark stain or glaze to enhance the distressed look. For a whitewashed effect, apply a mixture of white paint and water, then wipe off the excess to achieve a weathered look.
Incorporating Natural Elements:
Bring the outdoors inside by incorporating natural elements into your nightstand makeover. Consider using materials like driftwood, branches, or reclaimed wood to create a unique and rustic look. Attach these elements to the nightstand using screws or strong adhesive.
Personalizing with Photos or Artwork:
Add a personal touch to your nightstand by incorporating photos or artwork. Frame your favorite photos or artwork and place them on top of the nightstand or hang them on the wall above. You can also use adhesive or decoupage techniques to attach smaller photos directly onto the nightstand’s surface.
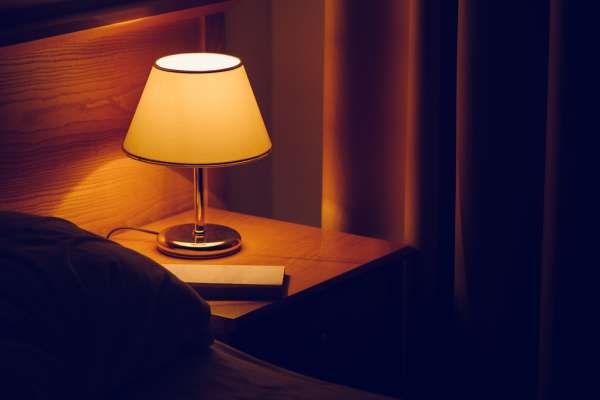
Enhancing with Lighting:
Consider adding lighting elements to your nightstand to enhance its functionality and style. Install a wall-mounted reading light or attach a small lamp to the nightstand. You can also use string lights or LED strips to create a soft and ambient glow.
Organizing with Drawer Dividers:

If your nightstand has drawers, use drawer dividers to keep your belongings organized. Purchase or create dividers that fit the dimensions of your drawer, and use them to separate items like socks, accessories, or books. This will not only declutter your nightstand but also make it more functional.
Incorporating DIY Fabric Covers:

Give your nightstand a cozy and decorative touch by creating fabric covers for the top surface or drawer fronts. Choose fabrics that match your bedroom decor or add a pop of color. Measure and cut the fabric to fit the desired areas and attach them securely using adhesive, double-sided tape, or upholstery staples.
The Final Thoughts:
A DIY nightstand makeover is an excellent way to add a personal touch and breathe new life into your bedroom decor. Whether you opt for a simple paint job, decoupage, or more elaborate techniques, the possibilities are endless. Consider your personal style and the overall theme of your bedroom, and let your creativity shine through as you transform your nightstand into a stunning and functional piece of furniture. Enjoy the process and the satisfaction of creating a unique nightstand that reflects your individuality.