
Building a DIY bedroom blanket fort is a fantastic way to tap into your inner child and create a cozy, private space. Whether you’re looking for a fun family project or a peaceful hideaway just for yourself, a blanket fort offers a retreat from everyday life. The joy of designing your own fort not only provides a sense of accomplishment but also turns an ordinary bedroom into a playful, relaxing sanctuary. With just a few materials and a bit of imagination, you can transform your space into a delightful fortress that’s all your own.
Gathering Your Materials: What You Need for the Perfect DIY Blanket Fort

Before you begin, it’s important to gather the right materials for your DIY bedroom blanket fort. Start with blankets, sheets, or throws—these will form the main structure of your fort, so choose fabrics that are large enough to cover the space you’re planning to build. Soft, thick blankets work best for both comfort and insulation. Next, think about the furniture or other objects you can use to support the fort. Chairs, sofas, or even a sturdy table can help create the frame for your blanket fort. Don’t forget about pillows and cushions; these will not only add extra comfort but can also help secure your fort’s structure. Additionally, clips or small ropes are useful for tying sheets and blankets together for added stability.
Choosing the Right Location for Your DIY Bedroom Blanket Fort

Selecting the ideal location for your DIY bedroom blanket fort can make all the difference. Look for an area that’s spacious enough to accommodate your fort but still feels intimate and secluded. The best spot is typically in a corner of the room or between two pieces of furniture. A spot near a bed or along a wall helps ensure that your fort stays in place and offers more security. Make sure the space is free from distractions so you can truly enjoy your fort once it’s complete. Also, think about accessibility—pick a location that’s easy to enter and exit, especially if you plan to use your fort frequently.
Building Your DIY Bedroom Blanket Fort: Step-by-Step Instructions
Creating your own DIY bedroom blanket fort is a fun and rewarding process. With the right materials and a bit of creativity, you can easily transform your bedroom into a cozy, magical retreat. Here’s a simple, step-by-step guide to help you build the perfect blanket fort:
Step 1: Choose Your Location

Start by deciding where you want to build your blanket fort. The ideal location is a space that feels comfortable and secluded but is also large enough to accommodate your fort. Corners of the room, along walls, or between two pieces of furniture work best. You’ll need enough space to stretch out and make your fort cozy.
Step 2: Set Up Your Fort’s Frame
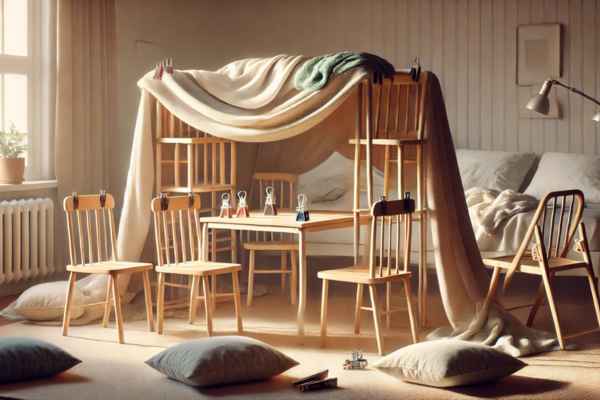
Once you’ve chosen your location, it’s time to set up the structure. Use chairs, a sofa, or a sturdy table to create the framework of your fort. Arrange the furniture so that it’s close enough to create a solid base but also provides enough space for the blankets to drape over them. If you’re using a table, simply drape a blanket over the top, letting the edges fall to the floor. For chairs or couches, place a large blanket over the backrest, securing the corners with clips or tucking them under the furniture for added stability.
Step 3: Add Pillows and Cushions for Stability

To prevent your fort from collapsing, add pillows or cushions along the base of the furniture. This will not only stabilize the structure but also make the inside more comfortable. Use cushions to weigh down the edges of the blankets and prevent them from sliding or shifting.
Step 4: Drape the Blankets
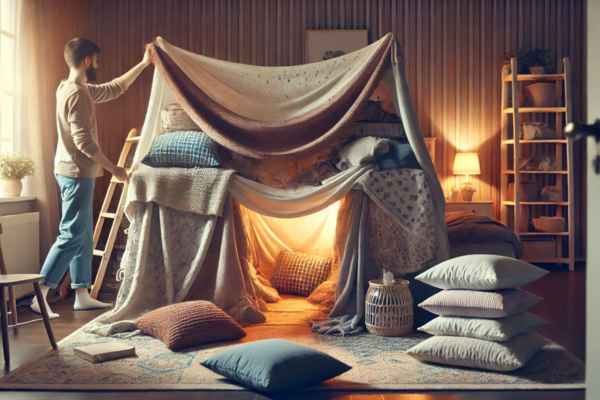
Now it’s time for the fun part—draping the blankets. Use large, soft blankets or sheets for the roof and walls of your fort. Drape them over the furniture, securing the edges as needed. If you’re building a tent-like structure, make sure the blankets hang down evenly on all sides. For a more enclosed space, create walls by draping blankets around the furniture and securing them to the floor with more pillows or heavy objects.
Step 5: Secure the Fort with Clips or Ropes

To keep your fort from falling apart, use clips, safety pins, or ropes to secure the blankets. If you have a large sheet, clip the edges to the furniture to ensure they stay in place. For extra support, tie ropes around furniture legs or other sturdy items and attach the blankets to them. Be sure not to overdo it—just enough to keep everything in place.
Step 6: Create a Doorway or Opening
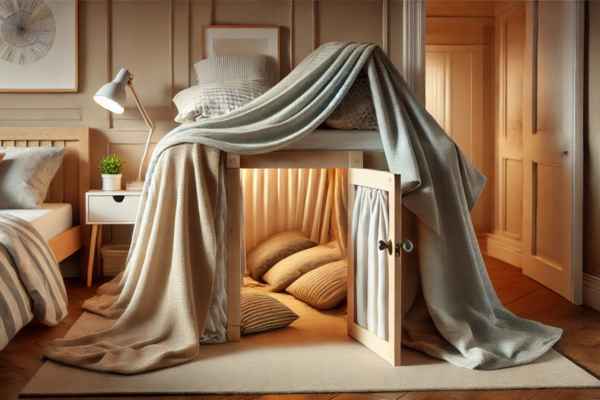
Every fort needs an entrance! You can leave one side of your blanket fort open for easy access or create a small doorway by gathering the blankets in the middle and securing them with a clip or string. If you prefer a more enclosed fort, you can make a small flap that you can move aside when you want to go in and out.
Step 7: Adjust and Fine-Tune
Take a step back and look at your fort to see if everything is stable. Adjust the blankets as needed to create the perfect shape and ensure there are no sagging areas. Use additional pillows or blankets to reinforce any weak spots.
Enhancing Your Fort: Personalizing Your DIY Bedroom Blanket Fort
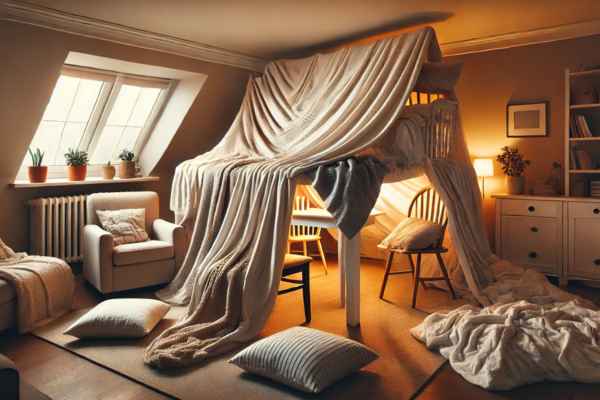
Once your DIY bedroom blanket fort is built, it’s time to make it truly your own. Personalizing your fort adds a sense of magic and comfort. Start by decorating the inside with soft lighting—fairy lights or battery-operated string lights work perfectly to create a warm, inviting glow. You can also hang tapestries or fabric on the inside walls to create a cozy ambiance. For added comfort, scatter pillows and blankets inside for a plush sitting area.
You want to take it a step further, consider adding a theme to your blanket fort. Whether it’s a space adventure, a cozy cabin retreat, or a whimsical castle, personalizing your fort makes it even more special. Add small details like fairy figurines, plush toys, or even a small rug to make the space feel like your own private getaway. The more you customize, the more enjoyable and unique your blanket fort will become.
DIY Bedroom Blanket Forts for All Ages: Fun for Kids and Adults Alike
DIY bedroom blanket forts are not just for kids—they’re a fun and nostalgic activity for people of all ages! Whether you’re a child looking for an adventurous hideaway or an adult searching for a cozy space to unwind, a blanket fort can be customized to suit your needs. For children, a blanket fort becomes an exciting playhouse where they can let their imagination run wild, pretending they are in a magical kingdom or a secret hideout.
Adults can also enjoy the comforts of a blanket fort, turning it into a peaceful retreat for reading, napping, or watching movies. Building and relaxing in a fort can spark creativity, bring families together, or provide a quiet, calming space away from the hustle and bustle of everyday life. No matter your age, creating a DIY blanket fort can be an enjoyable and relaxing way to reconnect with your inner child and embrace a sense of adventure.
Safety First: Making Sure Your DIY Bedroom Blanket Fort is Stable and Secure
While building your DIY bedroom blanket fort is all about fun, it’s important to keep safety in mind to avoid accidents. Stability is key when constructing your fort to ensure it doesn’t collapse unexpectedly. Start by using sturdy furniture, such as chairs or sofas, as the base for your fort’s frame. Ensure that the furniture is not wobbly or prone to tipping. When draping blankets over your fort’s structure, make sure they are securely attached with clips, safety pins, or small ropes. Avoid using heavy or flammable materials, especially when incorporating lights into your fort, as this could pose a fire hazard. If you decide to add fairy lights or string lights, opt for battery-operated versions to reduce the risk of electrical issues. Finally, check that the fort’s roof and walls are stable before crawling inside to ensure a safe, secure experience for everyone involved.
Fort Activities: How to Make the Most of Your DIY Bedroom Blanket Fort
Once your DIY bedroom blanket fort is built, it’s time to make the most of your new space with fun and engaging activities. For kids, the possibilities are endless—forts can become spaces for storytelling, puppet shows, or even treasure hunts. Bring out their favorite toys, board games, or art supplies and let their imaginations run wild. Adults can also enjoy their fort by transforming it into a cozy reading nook, a space for movie marathons, or even a spot to meditate and relax.
Host a fort-themed dinner, complete with snacks and drinks inside the fort, or have a quiet solo retreat with a cup of tea and your favorite book. You can also organize a movie night with blankets and cushions, or use the fort as a mini-office for creative brainstorming. The activities inside your fort are limited only by your imagination, so feel free to experiment and make your blanket fort an unforgettable experience.
Keeping It Clean: How to Maintain Your DIY Bedroom Blanket Fort
After enjoying your DIY bedroom blanket fort, it’s important to maintain its cleanliness and keep it in top shape for future use. Start by tidying up the space inside your fort. Organize pillows, blankets, and any toys or books that may have accumulated during your time in the fort. To prevent your fort from getting too cluttered, limit the number of items you bring inside and keep only the essentials, like a favorite pillow or a small lamp.
Fold up blankets and pillows neatly for easy storage. Be sure to check for any dirt or spills on the blankets—washing them periodically will keep them fresh and clean. To preserve the life of your fort materials, avoid over-stretching or pulling on the blankets too much, and make sure any clips or ropes are used gently. With a little maintenance, your DIY bedroom blanket fort will stay in great condition and be ready for the next round of fun!
Creative Ideas for a DIY Bedroom Blanket Fort Retreat
Your DIY bedroom blanket fort doesn’t have to be just a simple hideaway—it can also become a personalized retreat designed for relaxation and creativity. One of the easiest ways to elevate your fort experience is by turning it into a quiet sanctuary. Add soft fairy lights or candles (battery-operated for safety) to create a peaceful, ambient glow. Bring in some plush cushions, blankets, and throws to transform the space into the ultimate relaxation spot. You can even make your fort a cozy reading nook by adding your favorite books and a comfortable pillow.
For a more luxurious retreat, consider adding a small rug, soft music, and a few scented candles to enhance the atmosphere. If you’re into mindfulness, your fort can serve as the perfect space for meditation or yoga, offering a quiet escape from the outside world. Whatever you choose, a DIY blanket fort retreat provides the perfect balance of comfort and creativity, making it a delightful escape at any time of day.
Upgrading Your DIY Bedroom Blanket Fort with Extra Features
Once you’ve mastered the basics of building your DIY bedroom blanket fort, why not take it to the next level with some creative upgrades? One simple feature you can add is a “door” to your fort. Whether it’s a curtain-style entrance, a flap that you can lift and lower, or even a string of beads hanging down, a doorway adds a playful element to your fort. For a multi-layered effect, consider adding a second story to your fort using a sturdy chair or a stack of pillows to create a balcony or lofted area.
You want to add a bit of whimsy, try decorating the inside with personal touches, like fairy lights, paper lanterns, or even wall decals to match your theme. Another fun upgrade could be building a secret compartment in your fort for snacks, books, or small treasures. You could also attach a hammock or a small swing inside for a relaxing experience. With these extra features, your DIY bedroom blanket fort can become a magical and multifunctional space that’s as unique as you are.
Troubleshooting Common DIY Bedroom Blanket Fort Problems
While building a DIY bedroom blanket fort is a fun and creative process, sometimes things don’t go as planned. One common issue is the fort collapsing or losing its structure. To prevent this, be sure to secure the blankets properly and use sturdy furniture or supports. If your fort is sagging in the middle, add extra pillows or heavier blankets along the walls and roof to reinforce the structure. Another problem could be the fort not being large enough to accommodate everyone comfortably.
You run into this issue, consider expanding the size by using larger blankets or rearranging the furniture to create more space. Additionally, if your fort feels too hot or stuffy, you can improve air circulation by leaving a small opening or window at the top or side to allow fresh air in. By anticipating these issues and adjusting accordingly, you can create a fort that is both sturdy and comfortable for everyone.
DIY Bedroom Blanket Fort Inspiration: Fun Ideas and Themes to Try
Looking for inspiration to make your DIY bedroom blanket fort even more exciting? Start by choosing a theme to guide your design. You could create a fairy tale castle, complete with banners and fairy lights, or a jungle hideaway, using green blankets and stuffed animals to simulate the wilderness. A space-themed fort with glow-in-the-dark stars, planets, and soft LED lights can transform your fort into a galaxy far, far away.
For something cozy and rustic, try a cabin in the woods theme by adding flannel sheets, faux fur throws, and wooden accents. If you’re looking for something a little more luxurious, why not try a Moroccan-inspired tent with colorful fabrics, tassels, and a few decorative lanterns? The possibilities are endless, and incorporating a theme into your fort adds an extra layer of fun and creativity. Whatever theme you choose, make sure to incorporate little details that make the space feel truly unique and personal.
Conclusion
A DIY bedroom blanket fort is more than just a childhood pastime—it’s a versatile and creative space that can be enjoyed by people of all ages. Whether you’re looking to build a fun playhouse, a cozy retreat, or a themed wonderland, the process of constructing and personalizing your fort allows you to add your own flair and imagination. By gathering the right materials, choosing the perfect location, and making the fort safe and comfortable, you can create a space that offers both adventure and relaxation. Don’t be afraid to upgrade your fort with extra features or experiment with new themes and activities. Most importantly, have fun with the process and enjoy the experience of creating a special hideaway where you can escape, relax, and let your imagination soar.